

Introduction
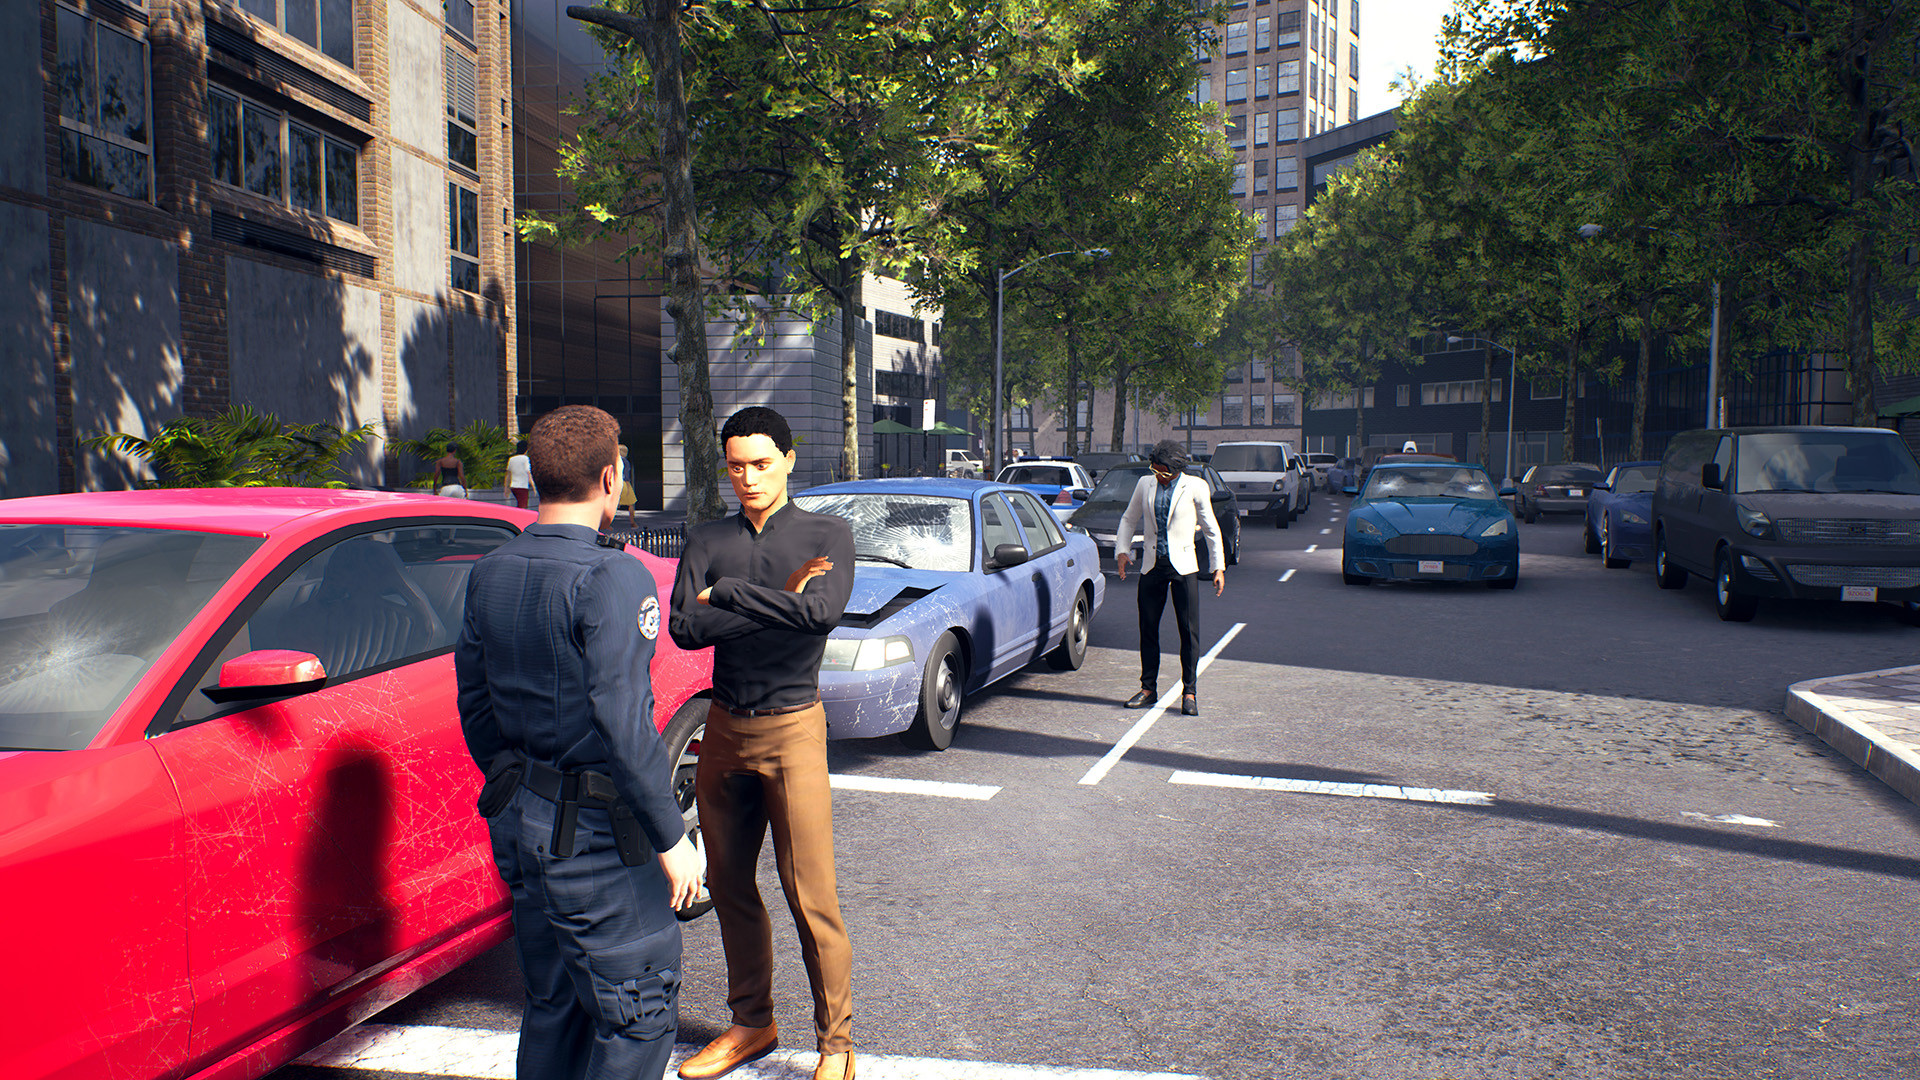
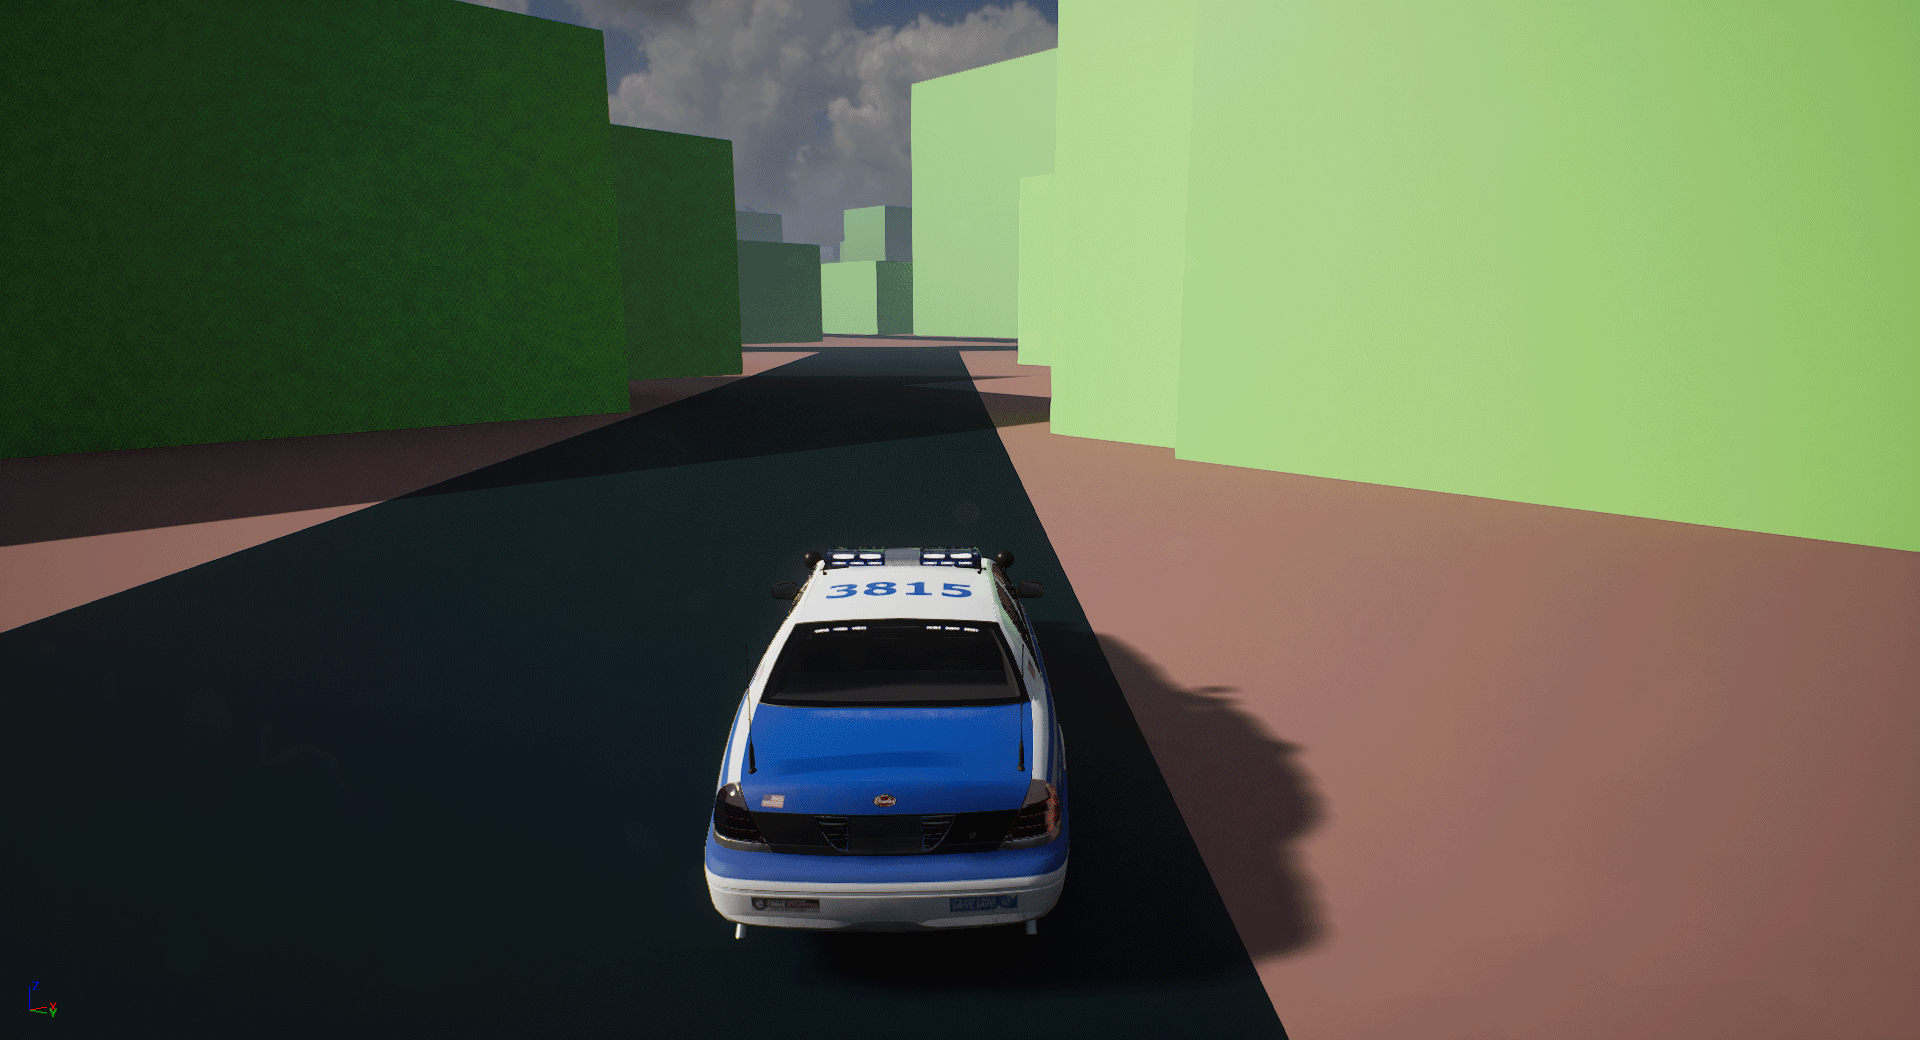
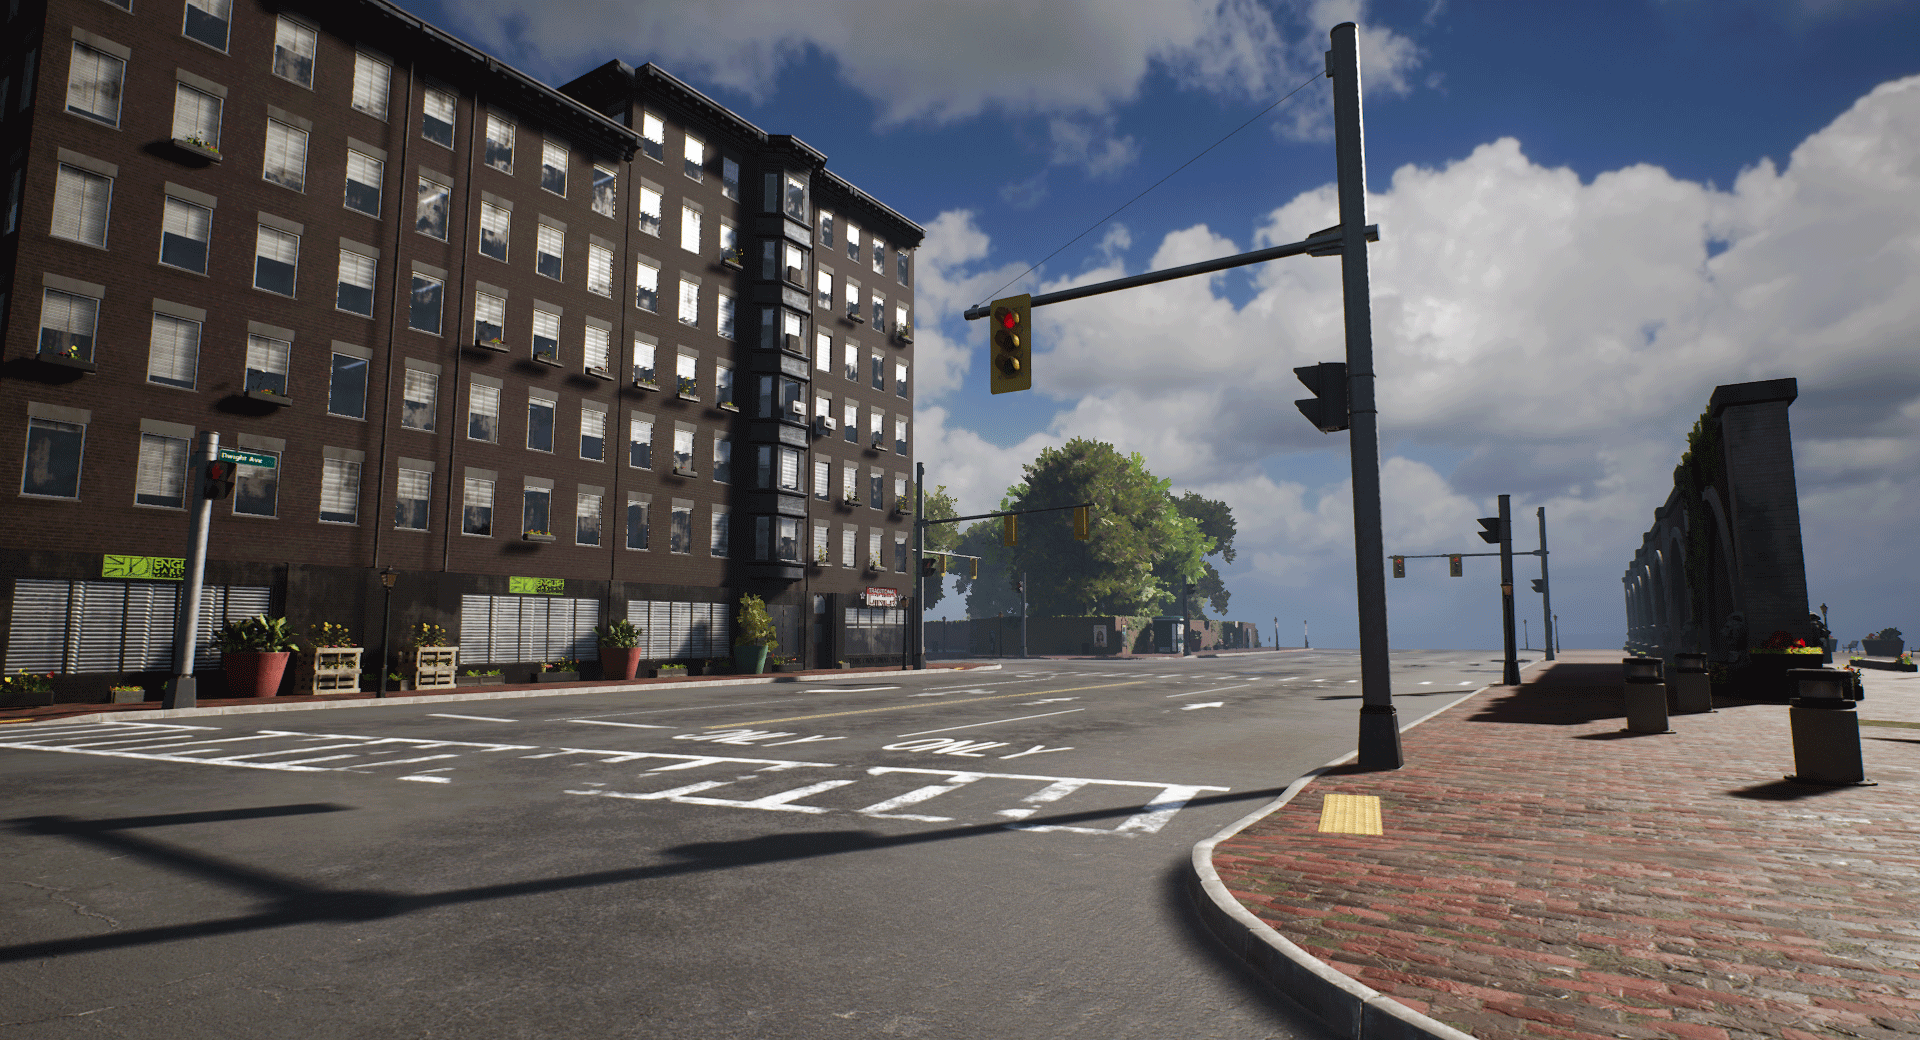
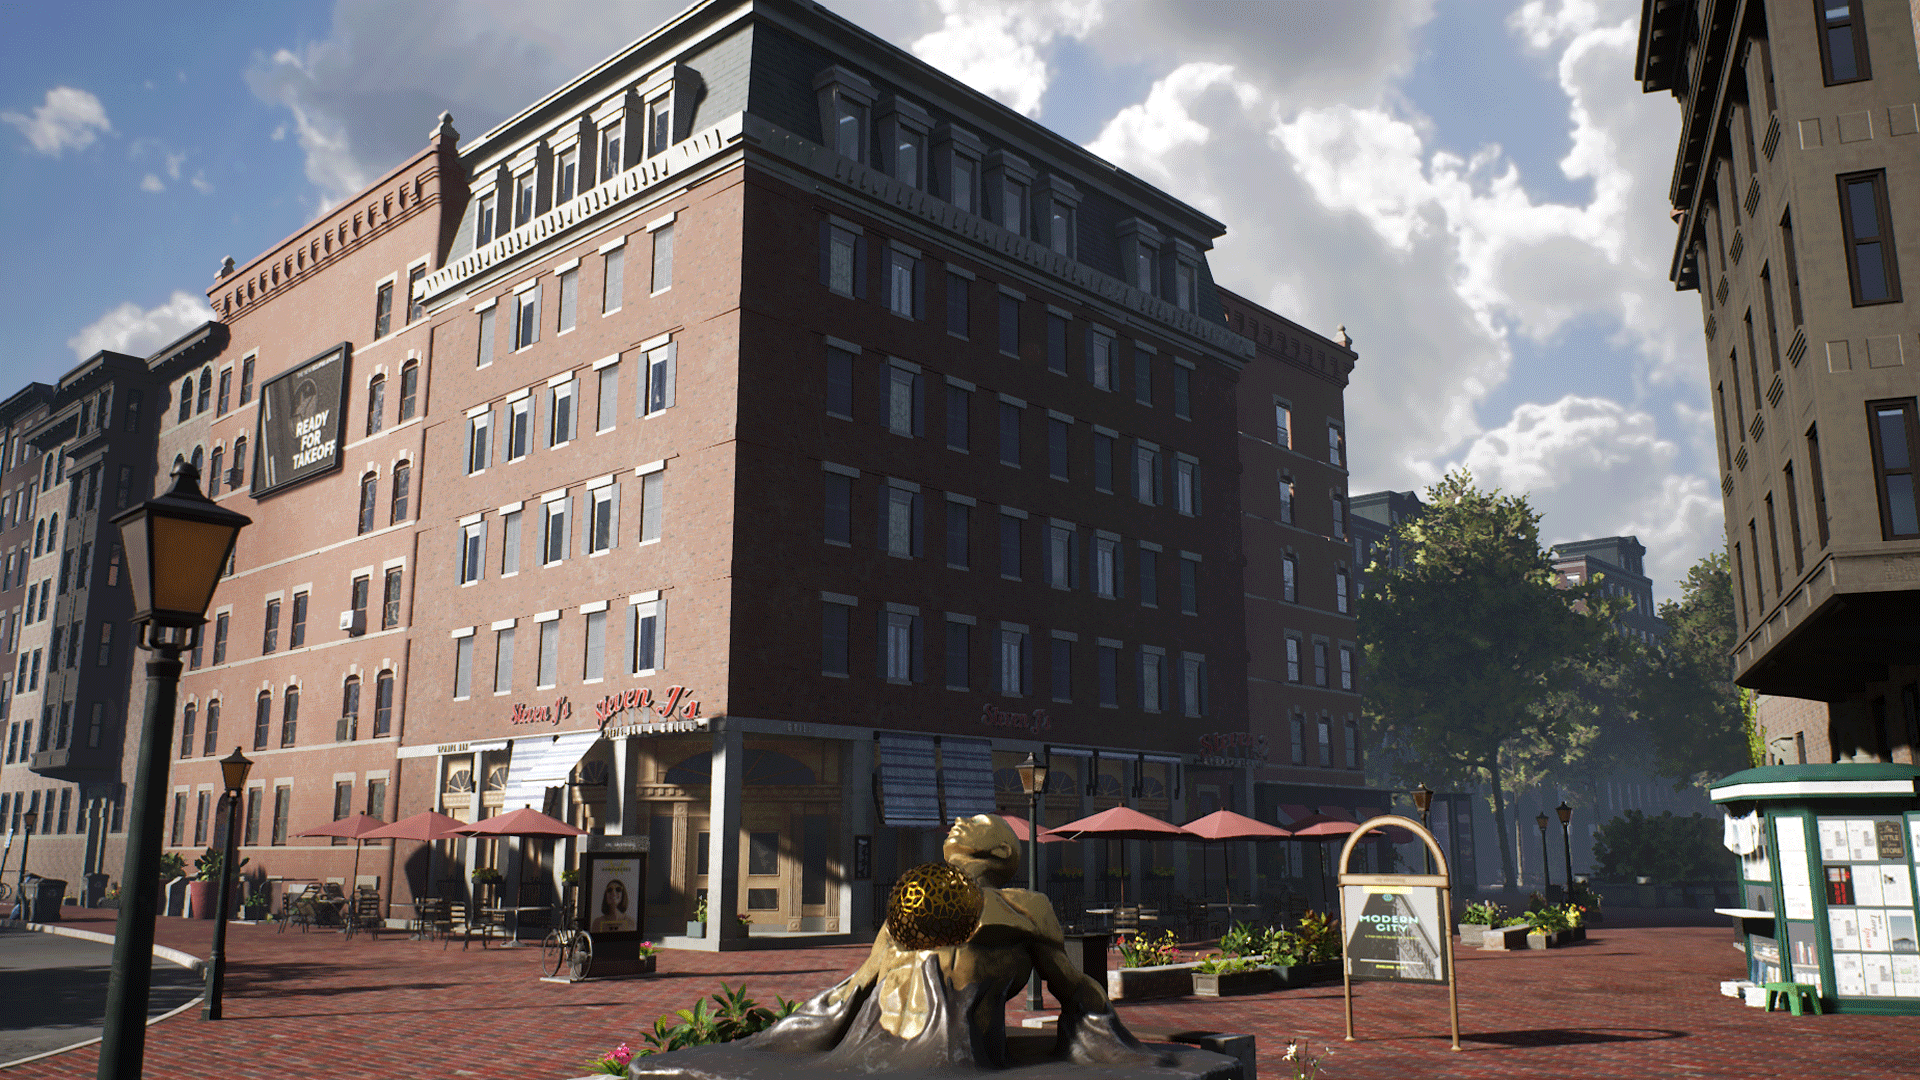
The game allows players to dive into the daily life of a patrol officer and take on duties such as handing out parking tickets, arresting citizens with open warrants, resolving traffic accidents and many more. Players are part of the police force of Brighton, a fictitious North American city.
We are Jonas Reich and Philipp Brasin, two Tech Artists from the team at Aesir Interactive, and we would like to take this opportunity to show you how we approached the creation of the open world environment and how we integrated Houdini in our custom procedural content pipeline inside Unreal Engine 4.
Going Procedural
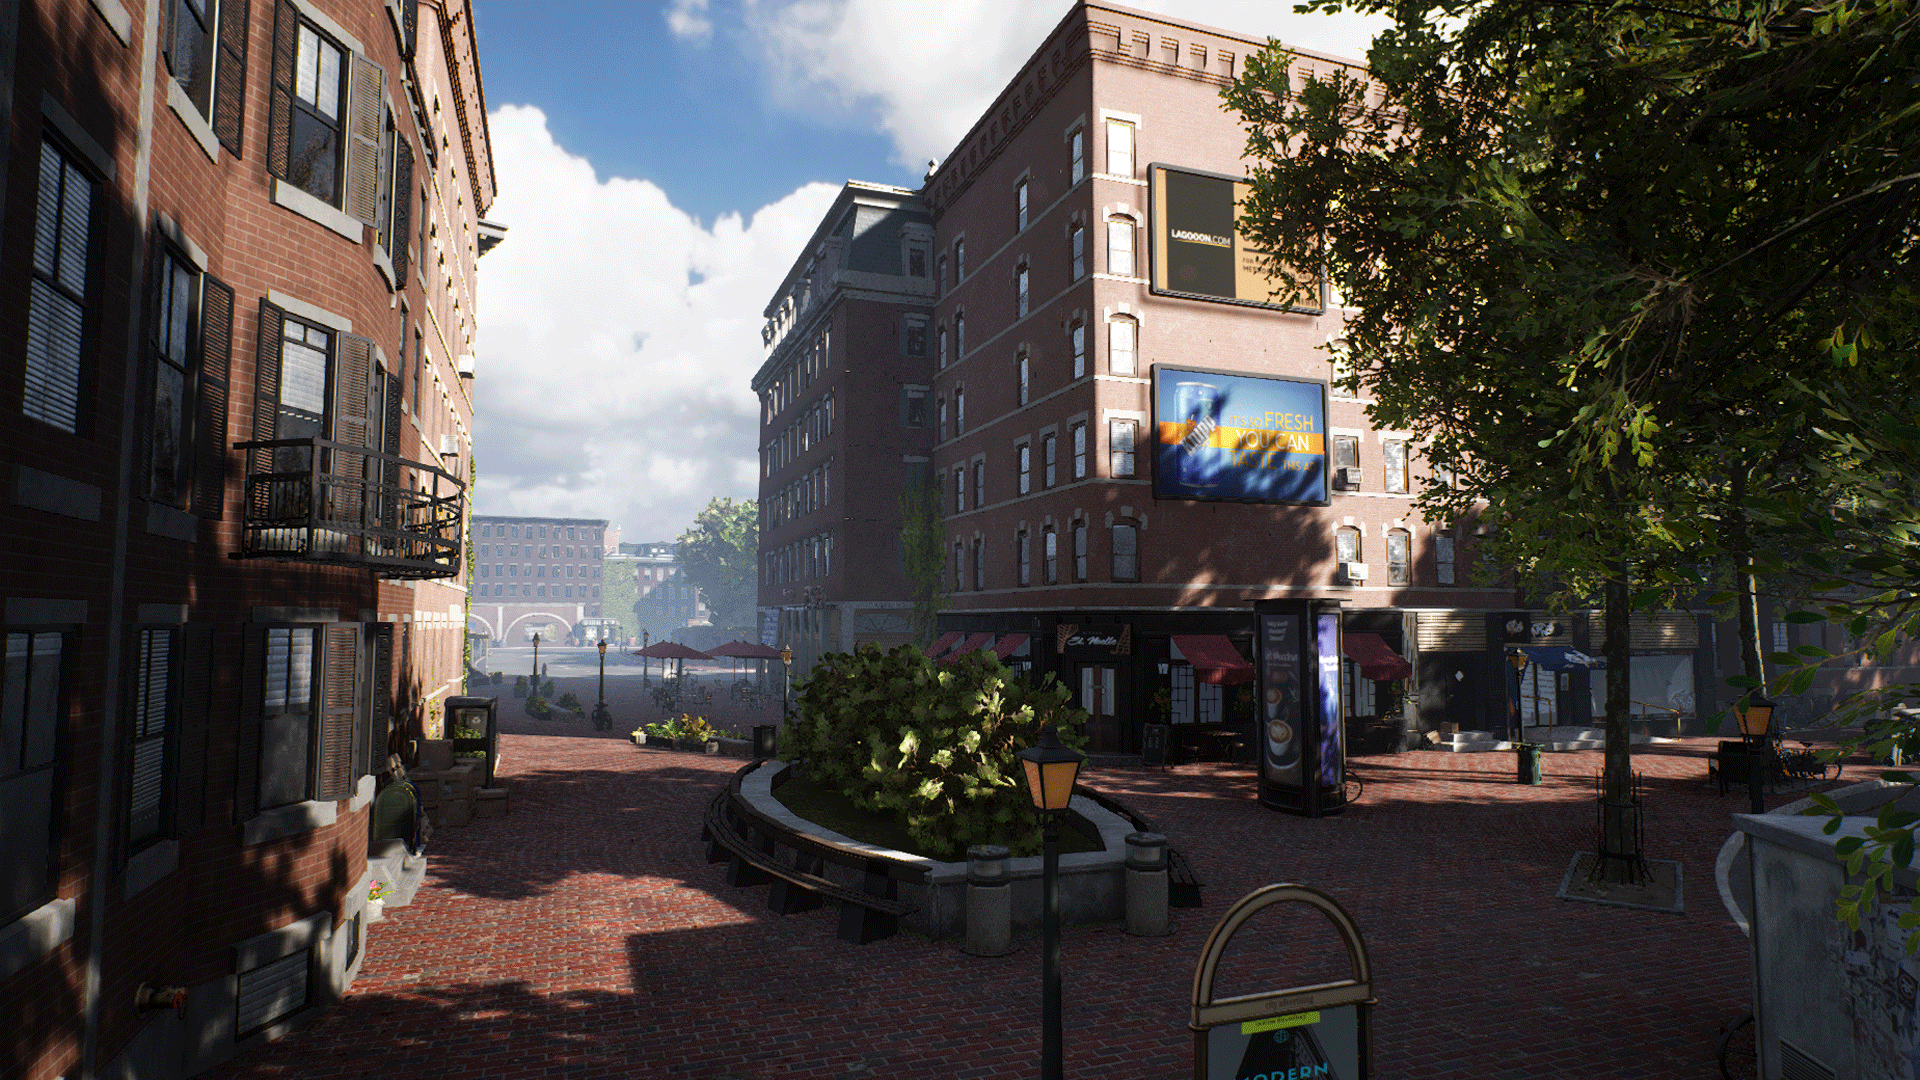
After developing the Windstorm games, we already had some experience with open world level creation at Aesir Interactive. Those games were mostly set in the countryside without any traffic or NPCs taking a stroll. We knew that we'd have to up our game for PS:PO if we wanted to fill a densely populated city with content that allows interesting exploration on foot while still being large enough to allow travel by car.
Creating big cities like this from scratch usually requires big level design and environment art teams consisting of dozens of people. We always planned with a relatively small team, so leveraging procedural workflows was the obvious choice. The goal was to use smart tools that would allow us to work as efficiently as possible and enable content creation with as few repetitive or mundane tasks as possible.
Visual Prototypes
During prototype development our environment artists still placed everything manually. They could play around with ideas and still scrap everything without having to wait for tools to be adjusted to their needs.
We created two levels during this time:
- A small prototype map to showcase gameplay and atmosphere for the prototype, meant to be submitted to the German funding body FilmFernsehFonds Bayern
- An art vision scene without gameplay which had more refined visuals that acted as target visuals
Creating these maps helped us to determine how we wanted our artists and level designers to work and which steps in the process we wanted to simplify.
Functional Prototypes
In parallel with these art prototypes, we already familiarized ourselves with the unique challenges of generating roads and buildings for PS:PO by developing throwaway prototypes that were scrapped and completely redone shortly before we went into full production.
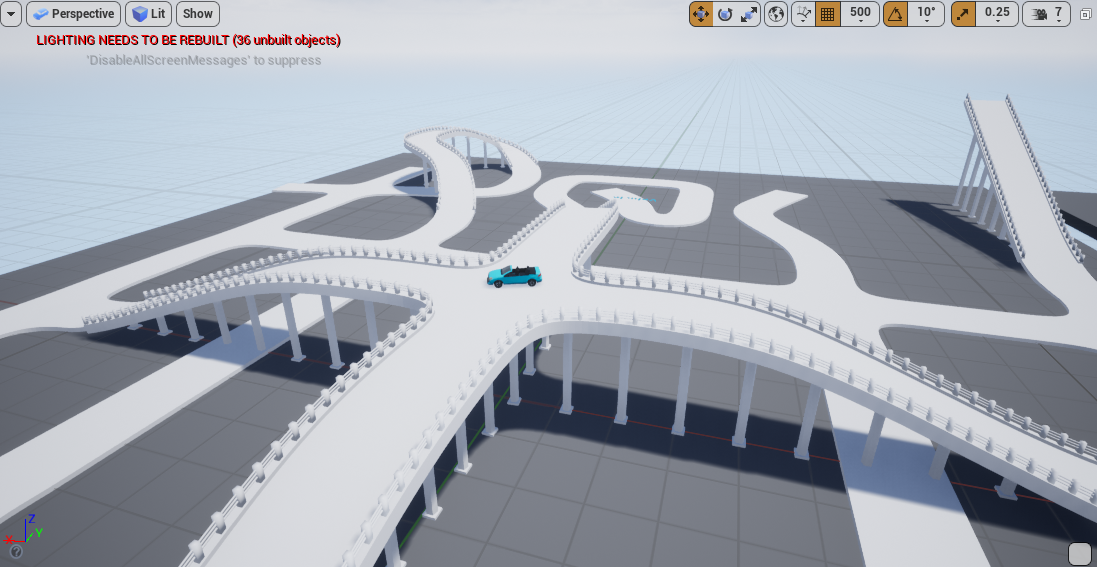
Some of the features we tested here, such as the roads with elevations and bridges, were dropped to reduce the complexity of the tools and to allow a focus on what was essential for our gameplay purposes and scope.
Grayboxing and Planning
Going procedural naturally allowed us to iterate road layouts quite a bit. Still, the generation times of our Houdini generators were long, so we had to approximate the city with grayboxing tools for faster iteration times. To visualize these first design steps, we used HDAs that converted 2D drafts created in Photoshop to 3D models in real in-game size.
Trying out different road layouts was possible within minutes, which gave us a better feeling of the dimensions, scale and density of roads and buildings required for aesthetic and gameplay purposes.
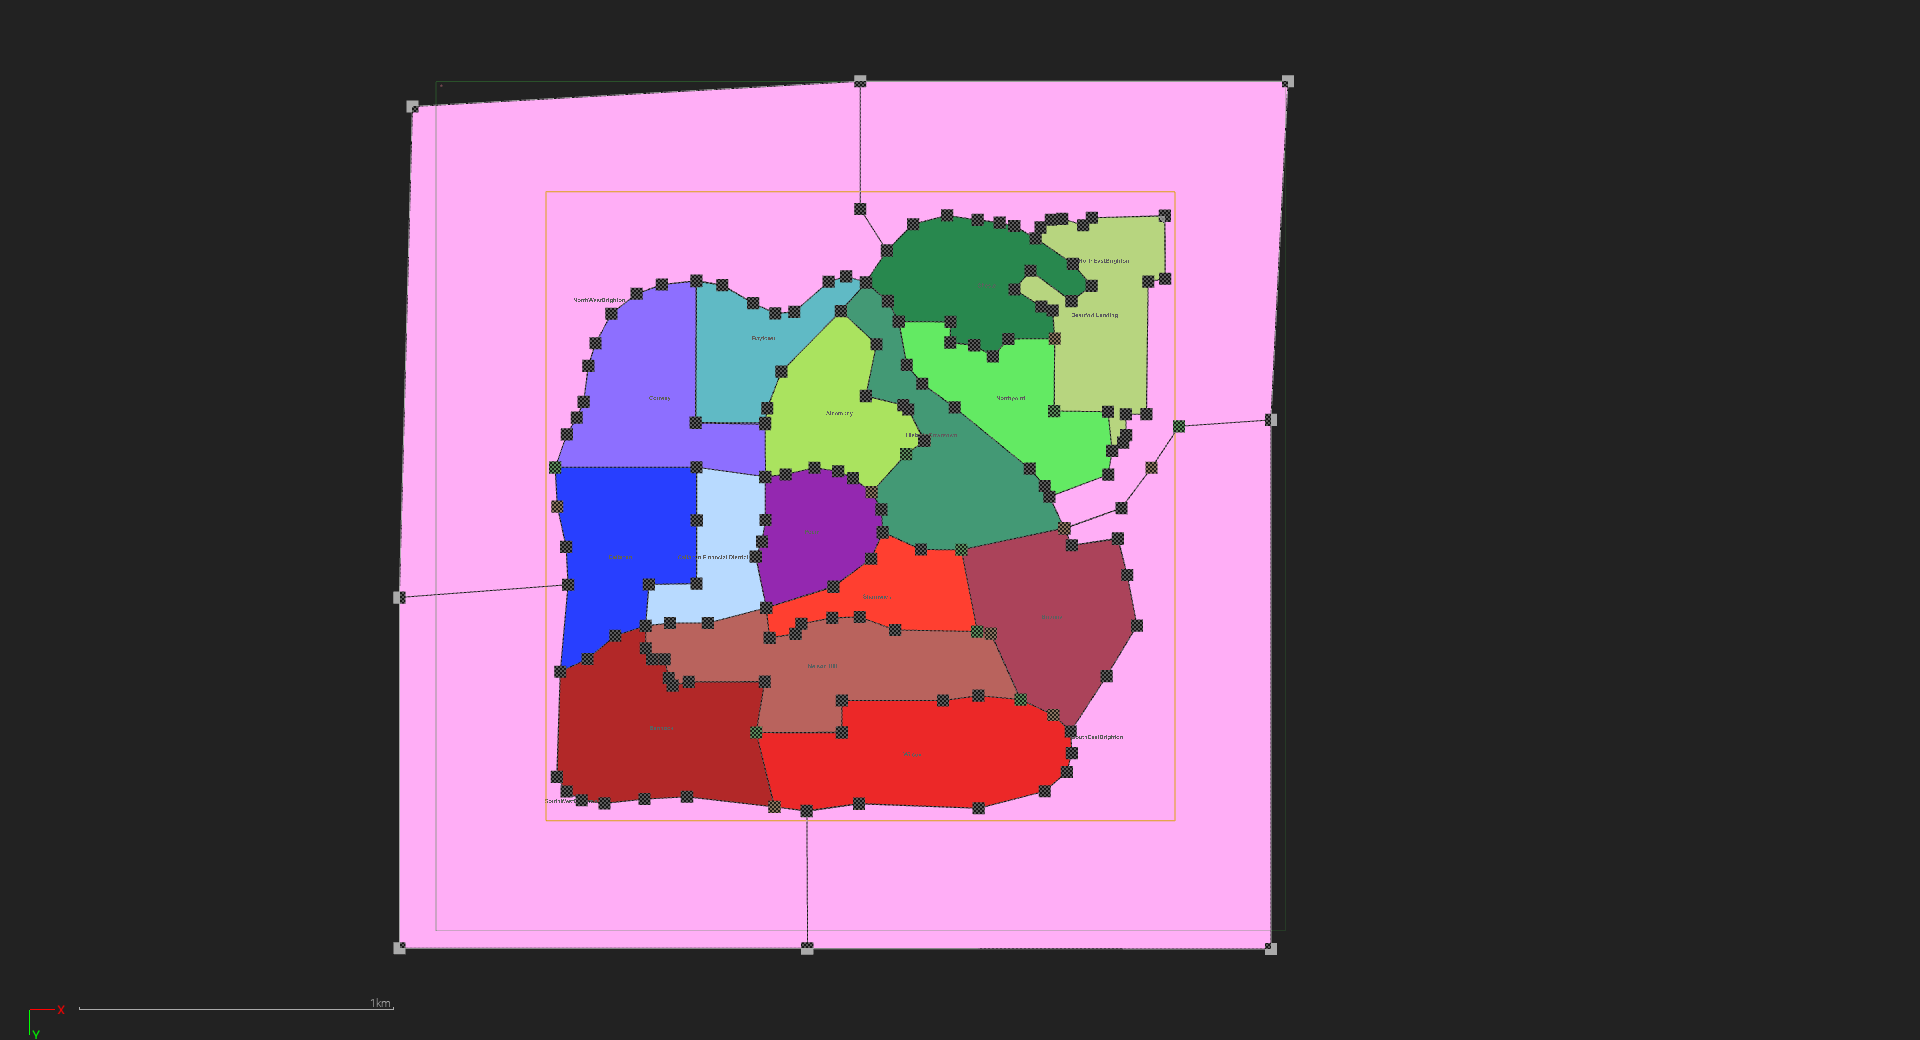
A different grayboxing tool was created to layout neighborhood and district areas using simple spline curves. The volumes generated from this tool were not only used for planning the layout but could also be loaded into our main generators to load area-dependent pools of materials and props.
Road Generation
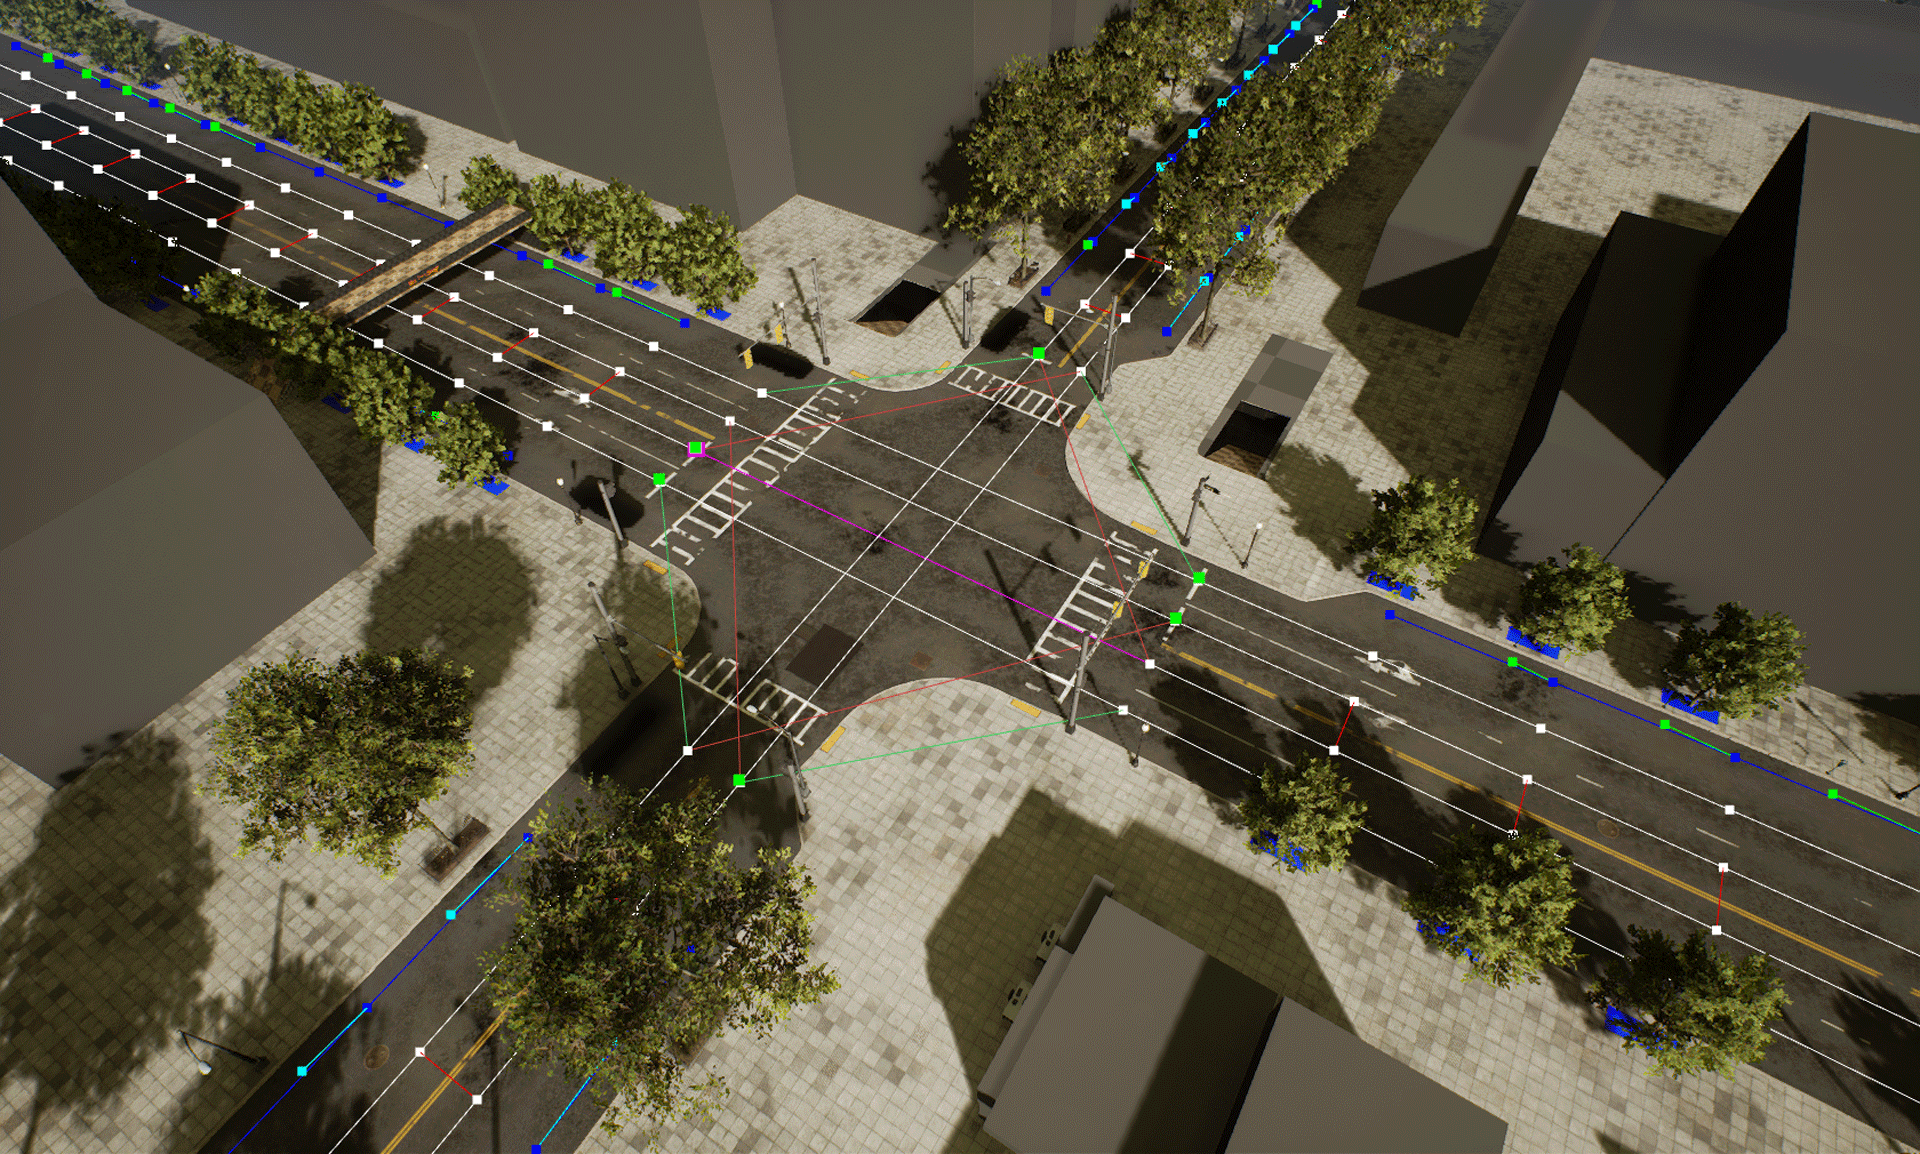
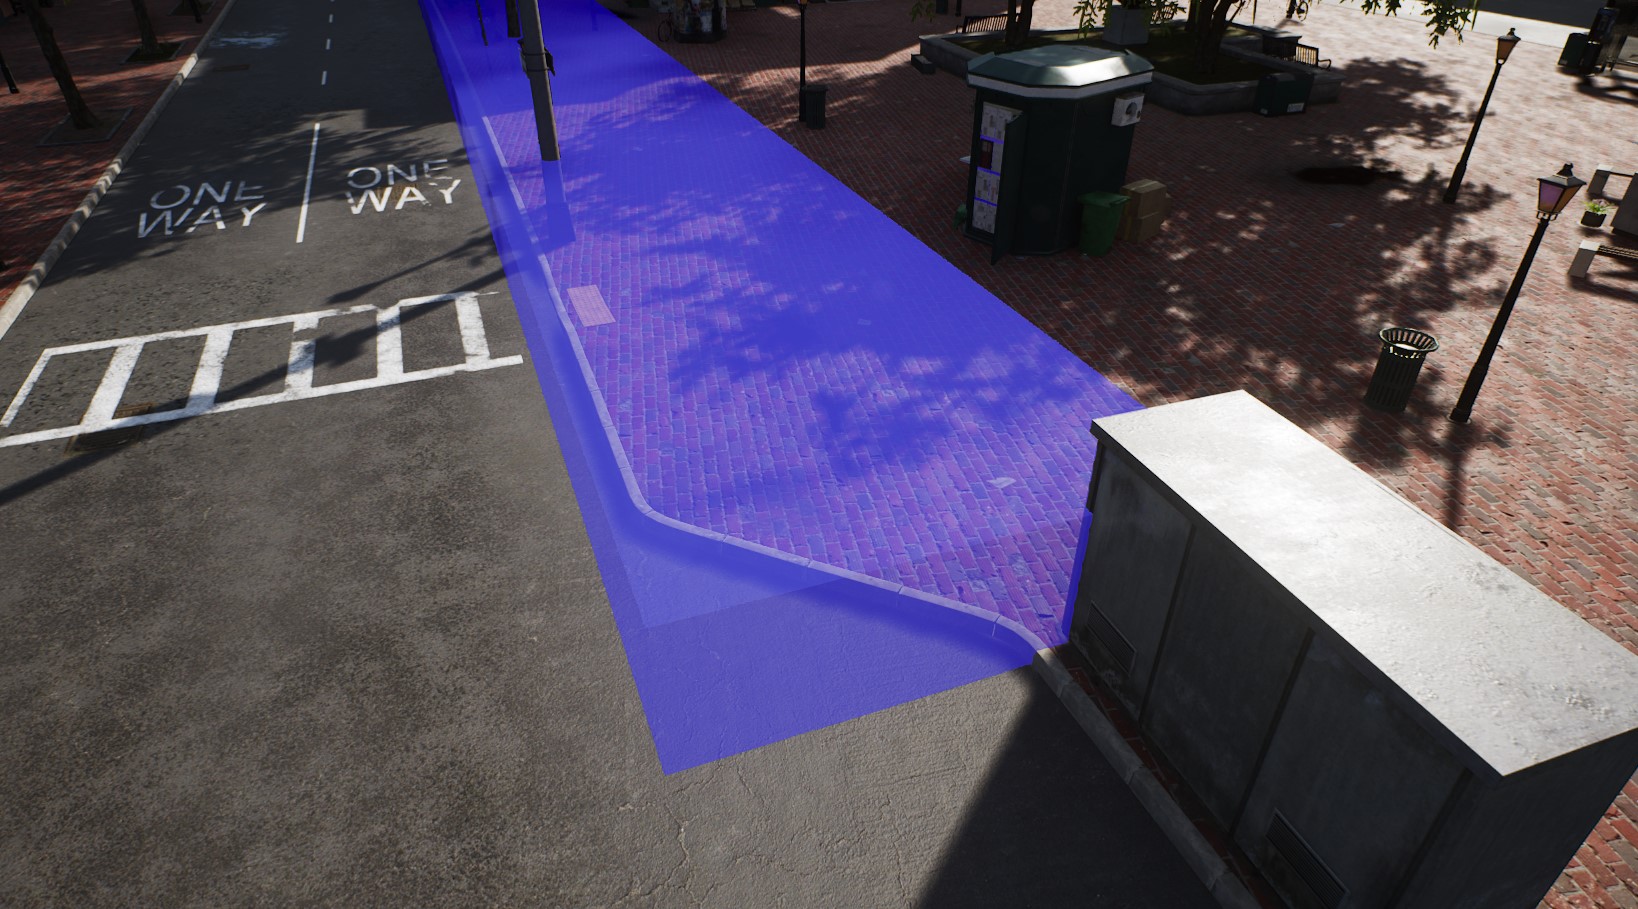
Let’s take a closer look at the first of our two big Houdini tools: The road generator is the source of all ground meshes (roads, sidewalks, curb stones, etc.) and the node network required for traffic simulation (see Road Generator Outputs below).
Road Generation Pt 1 - Road Editing and Rebuilding
Roads can be edited by our level designers using simple spline HDAs to get a preview of the road layout. This preview includes the rough topology of the roads (lane widths, shape, etc.) as well as some meta data (connections to other roads, etc.).
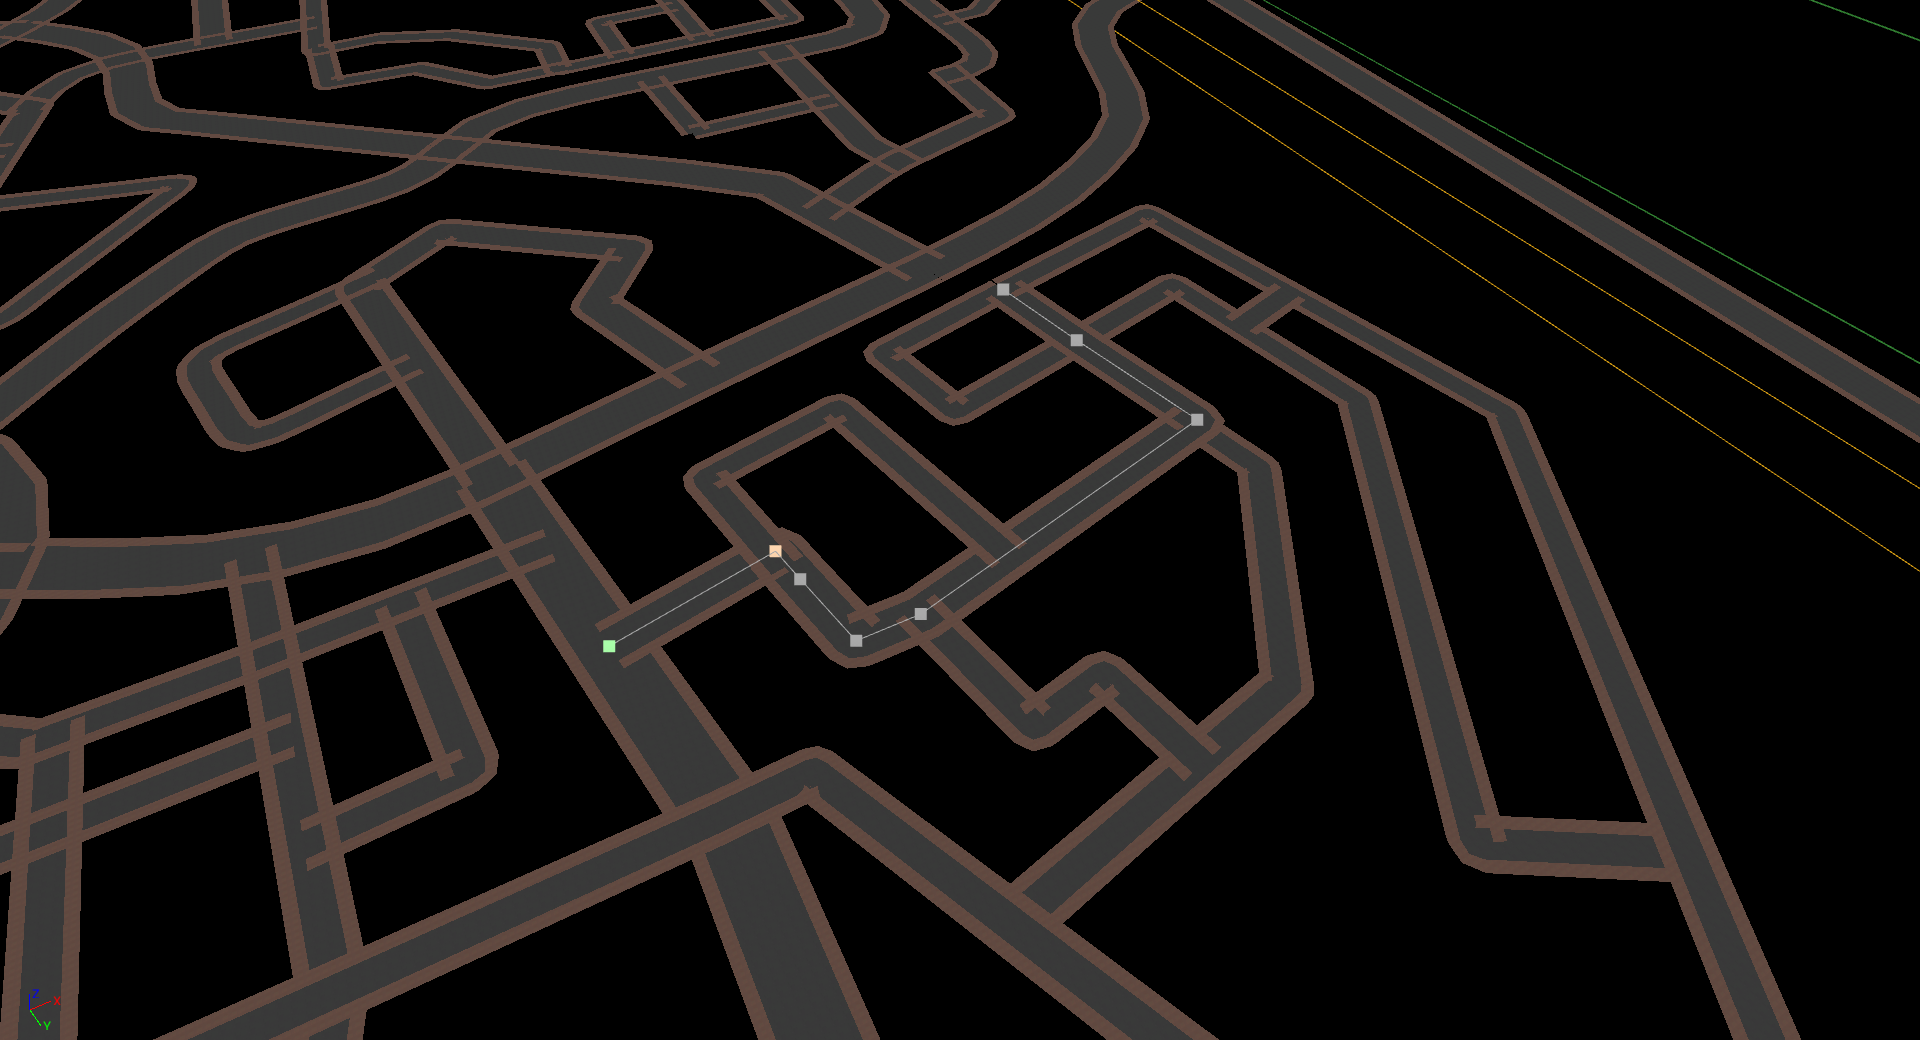
There are a couple of restrictions for how roads can be connected, such as not allowing two one-way streets to be placed in a way in which traffic would cause a face-to-face collision. This preview helps level designers find mistakes early in the process, with fast iterations due to short generation times for the entire map.
Road Generation Pt 2 - Inside Houdini
The road generator consists of multiple geo-level HDAs which were split in a way that allowed the separation of different problem areas of the road generation. The first one of these generators takes care of generating all geometry for the roads and sidewalks.
This is one of the more complex steps of the entire pipeline because we’re generating unique shapes for each intersection. We decided early on that restricting ourselves to a finite set of intersections with predetermined angles and lane configurations would not cut it because we considered this to be too limiting to our level designers. Of course, there are still limits to how many roads you can connect, but those restrictions also apply to real-world intersections, so this is not a problem for us.
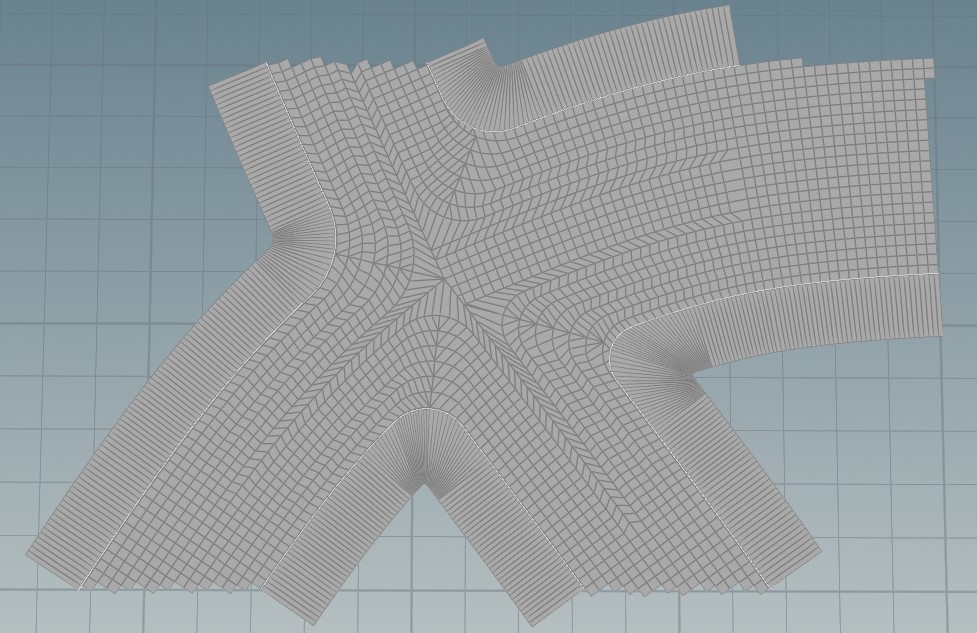
The intersections require the most complex geometry wrangling by far. Connecting them with road strips is relatively simple in comparison. After this is done, we have the basis for the next two parts of the generator:
On the one hand we need to generate some more geometry for all the areas between sidewalks. They are filled with ground meshes and strips of curbstones alongside the road edges. All these ground meshes are further refined by adding mesh decals and vertex colors for natural-looking wear and tear.
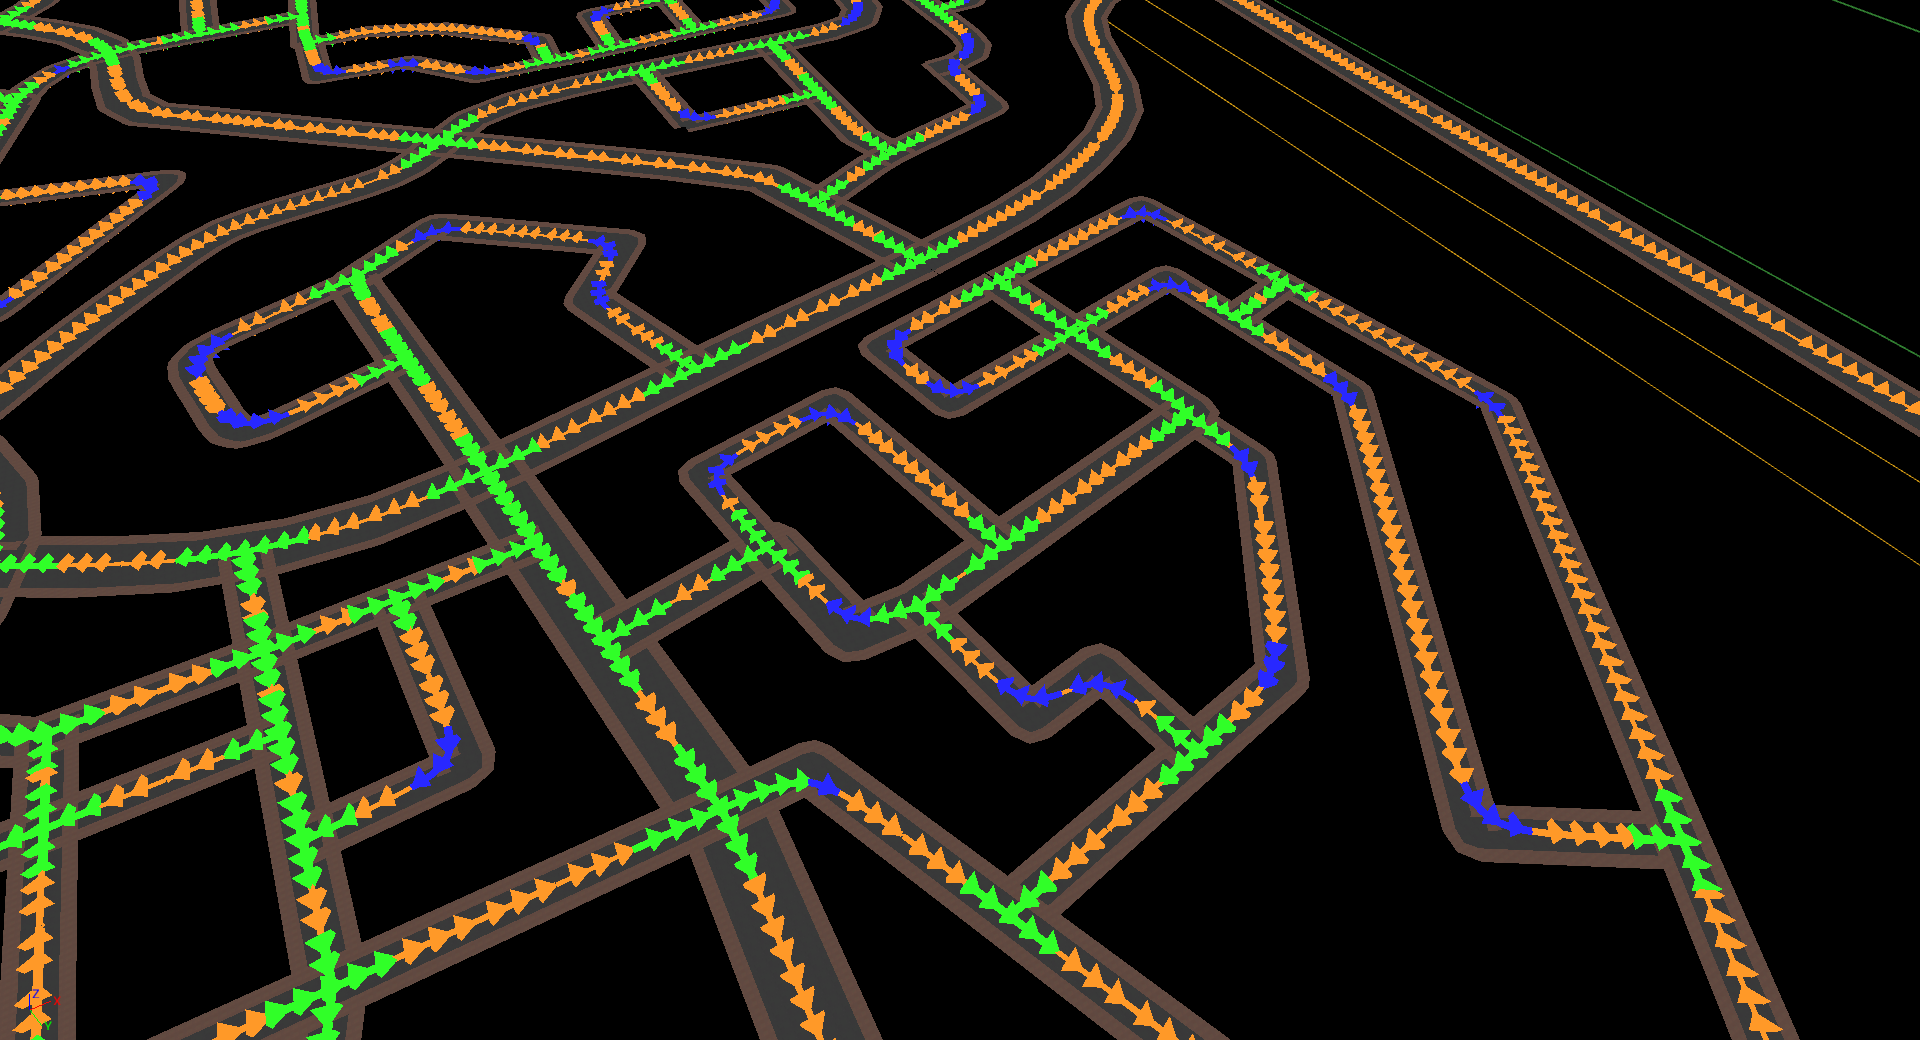
On the other hand, we have a complex traffic simulation in the game that needs to know the placement of roads, lanes, parking spots, etc. This data is also generated within Houdini. It is organized in a directed graph that contains meta information on speed limits and markup for traffic control objects such as signs and light signals.

Finally, we also scatter a bunch of props alongside the roads: Anything that is gameplay relevant like fire hydrants, signage or crosswalks come first, followed by beautification props including trees and trash cans. Not all the props are placed procedurally though: We always decide on a case-by-case basis whether it makes sense to include additional rules in our generators. For most cases it can be broken down like this: If any of the following questions can be answered with yes, it’s placed with Houdini - otherwise we go for manual placement.
- Is it connected to the traffic system? e.g. traffic lights, trees, signs
- Does it visually align with streets and/or have very simple placement rules? e.g. street lights
- Do we need more than 50 - 100 instances in the level? e.g. trees
Placement is realized with instancing point attributes to instruct UE4 which assets to place in which locations.
Road Generation Pt 3 - Road Generator Outputs
Let's take a look at the outputs of the road generator inside Unreal Engine! The generated meshes are divided into 50 by 50 meter chunks which are themselves grouped into streaming levels - we settled on a streaming level size of 150 by 150 meters, so there’s 9 Houdini chunks in one UE4 streaming level.


The props placed by the road generator receive additional meta information via UE4 properties and actor tags including their relation to the traffic node network. The prime example for this is our traffic light blueprint. We use the same blueprint for all traffic lights in the game, so the blueprint needs to know the amount and orientation of lanes that it controls to adjust its components accordingly.
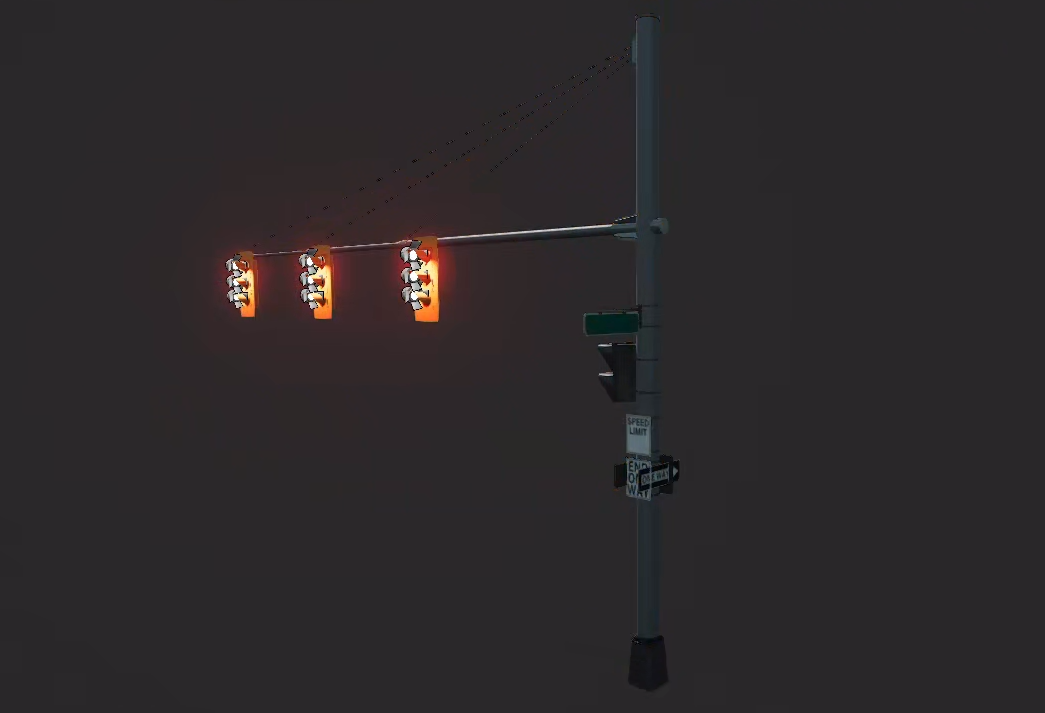

Depending on the lane count of the adjacent road, the blueprint can automatically extend the poles and add appropriate meshes and light components. Signage and pedestrian traffic lights that are attached to the same pole are also added on demand based on the properties passed on from Houdini.

The json serialized traffic system graph created alongside the static mesh geometry is imported to UE4 in order for it to be usable for our traffic system. We also created a custom editor mode that lets us inspect and edit the imported data to be able to debug it more easily.
Overall, the generation time inside Houdini for everything related to the roads is around 2.5 hours with an additional 10 hours for importing and processing all of the data in the UE4 editor. Because of these long run times we have an automated schedule to run the pipelines outside of regular working hours and on weekends, so that the artists' workstations are not blocked by Houdini pipelines checking out streaming levels.
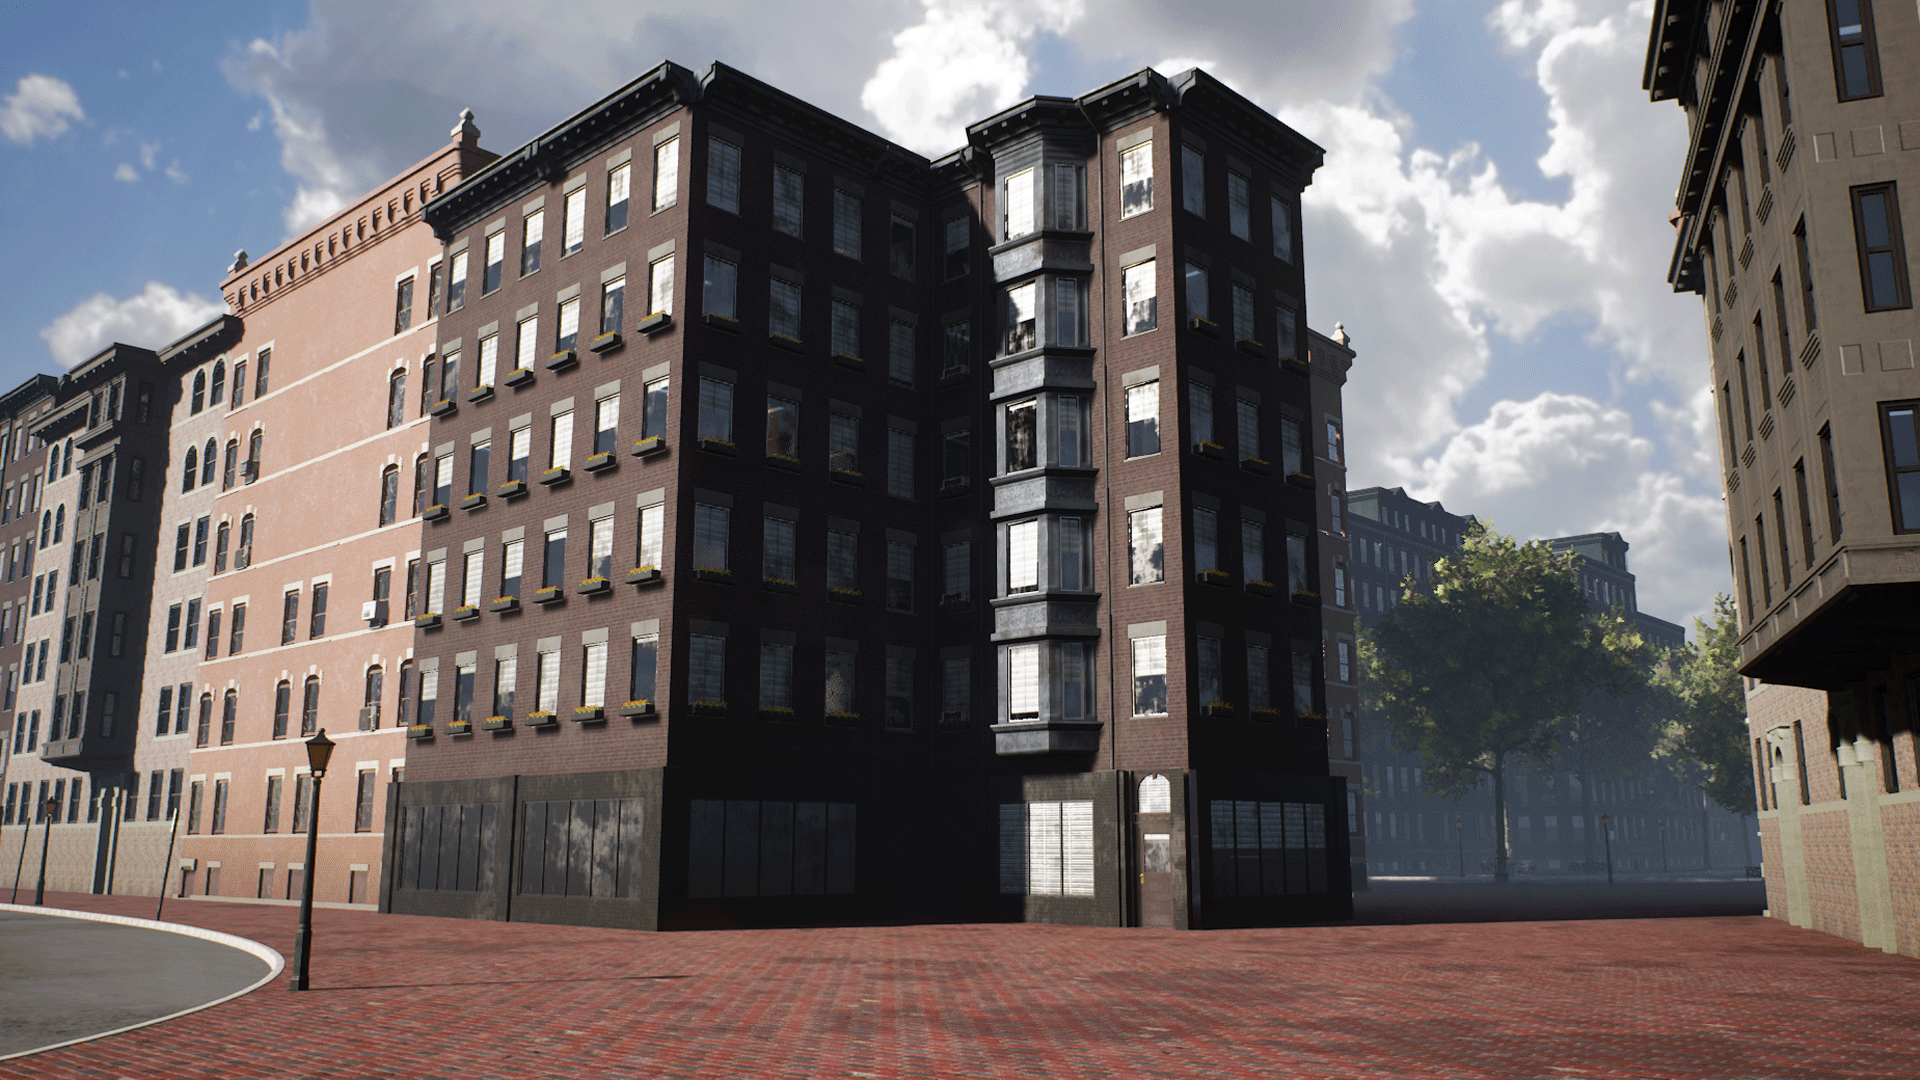
Building Generation
Building Generation Pt 1 - Instancing
The building generation can skip some of the steps required for road generation, simply because the buildings can be generated one by one without influencing neighboring buildings. As a result, we only need a single HDA with one HDA instance per building. The building generator also takes a different approach for geometry generation: Instead of generating all geometry with Houdini we instance prebuilt tileset pieces in UE4 using instancing points.
This approach has three main advantages:
- Rendering can be optimized to use hierarchical, instanced static meshes (HISMs) to reduce draw calls
- Artists have more control over building geometry and can go crazy with unique details without making the generator overly complex
- Development time and execution time of the HDA is a lot faster because of decreased complexity across the board
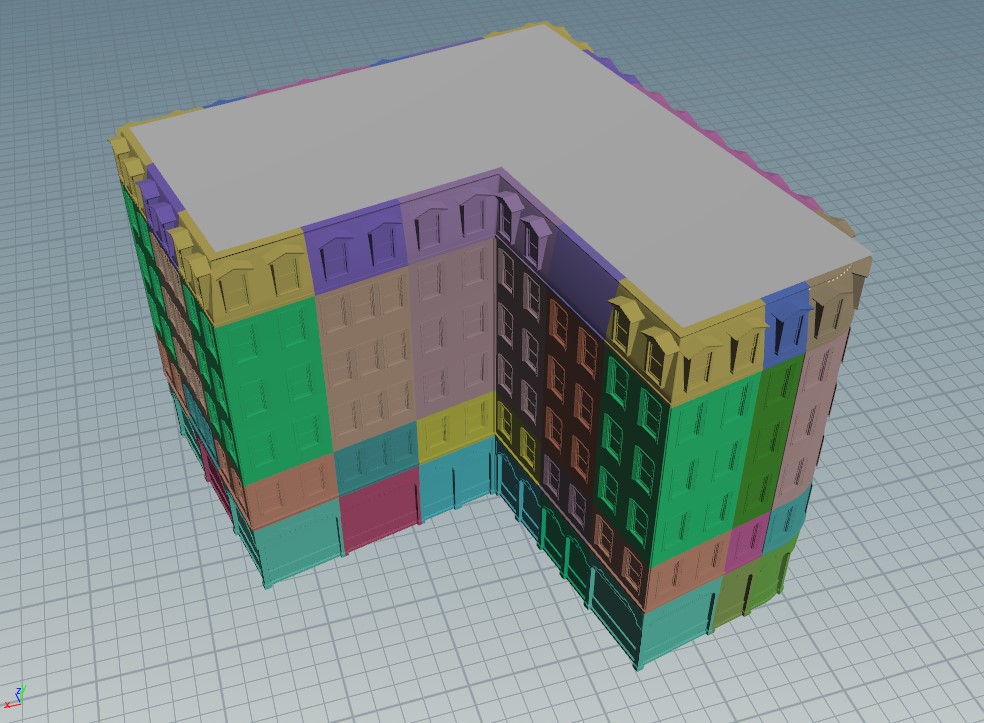
Building Generation Pt 2 - Tilesets
All pieces of a building are usually placed together in a folder with all its materials and some data assets that define tilesets.
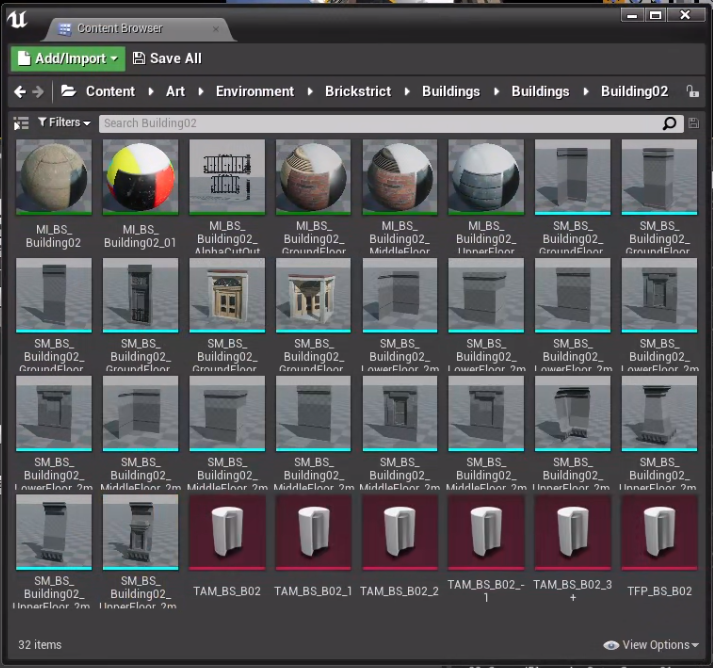
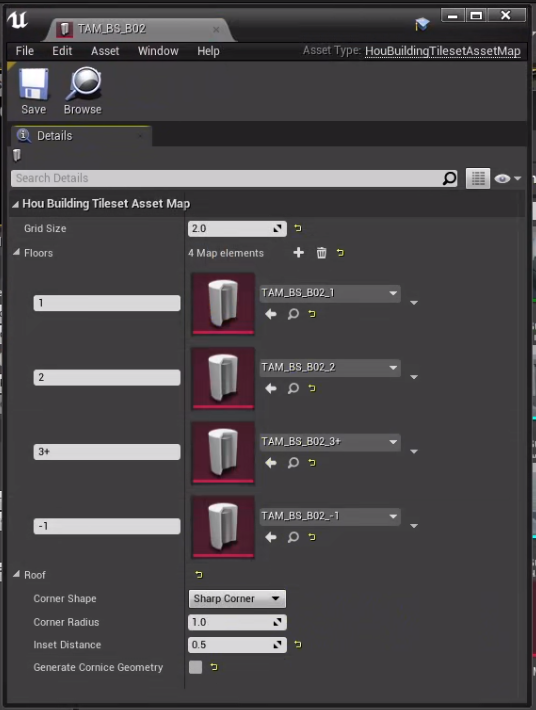
Each tileset can vary in size compared to other tilesets because artists can configure which tilesets may be mixed and matched. To accomplish this, we use these Tileset Asset Maps (TAMs) that define which pieces may be used together. The asset map defines a base piece size so we can create a snap-grid from this smallest unit. We then configure floor ranges that use a custom expression syntax to group floors and walls together, which allows for having different meshes and even heights for different floors.
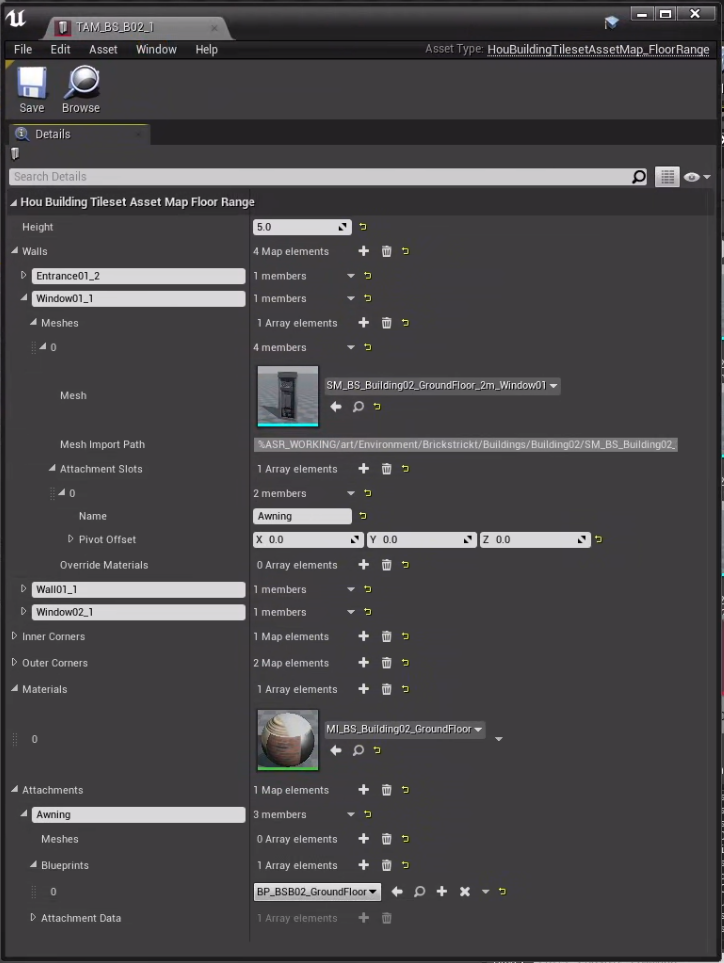
The example from the screenshot uses indexing similar to python array indexing. Positive numbers count from the bottom, negative numbers count from the top:
1: 1st floor (ground floor)
2: 2nd floor
3+: 3rd floor and everything above
-1: topmost floor (overrides previous rule)
The artists can then assemble the floor range asset maps that reference all of the available meshes, materials and blueprints for each of these floor ranges.
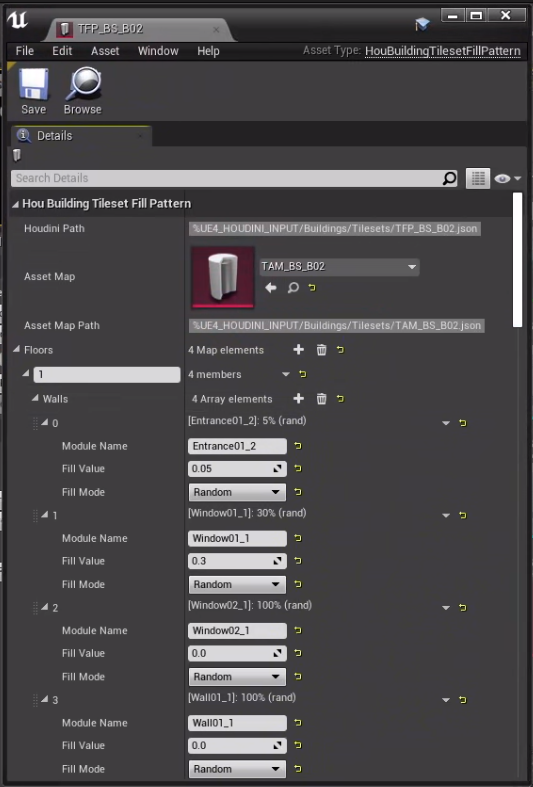
Finally, a last Tileset Fill Pattern (TFP) file is created that references a single asset map. The tileset fill patterns define how often and with which patterns the assets should be placed within a single floor. Separating the fill patterns from the asset maps makes it possible to create multiple configurations for how assets should be distributed from the same collection of assets.
All the tileset files are automatically exported to json text files that can be referenced inside the Houdini HDAs using a custom variable syntax. In the screenshot above you can see a Houdini Path in the first line:
%UE4_HOUDINI_INPUT/Buildings/Tilesets/TFP_BS_B02.json
Notice the variable %UE4_HOUDINI_INPUT at the beginning of the path. We set up environment files and added utility functions both for Houdini and UE4 to resolve them, so the paths can be used across workspaces and programs. In this case the variable refers to a folder that contains generic data files, exported from UE4, and acts as input to Houdini. We also have variables for the UE4 project root, working files, and many other commonly used directories.
This setup allows us to resolve project file paths independently from the working directory of the current Houdini session.
The environment file also contains a UE4_CURRENT_MAP entry that is set automatically by our UE4 Houdini plugin and makes it possible to access content for the currently loaded level in the UE4 editor. For example, %HOUDINI_ROOT%/%UE4_CURRENT_MAP%/Buildings/BuildingOutlines.bgeo contained a geo file with all building outlines of the current level.
This environment variable system is not used exclusively for the buildings, but for all other HDAs that need to exchange data via applications. Small systems like this really paid off by keeping the way we exchange data simple and consistent.
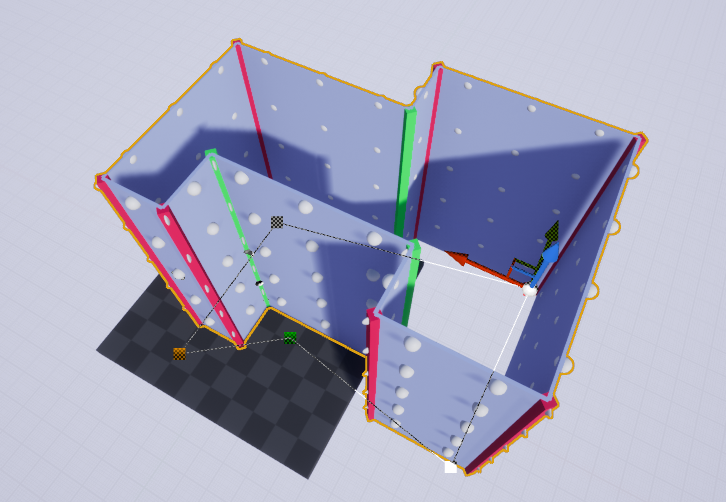
Building Generation Pt 3 - Inside Houdini
The HDA for the building generator is created on the object level and contains multiple sub-objects that are attached to each other for different parts of the building:
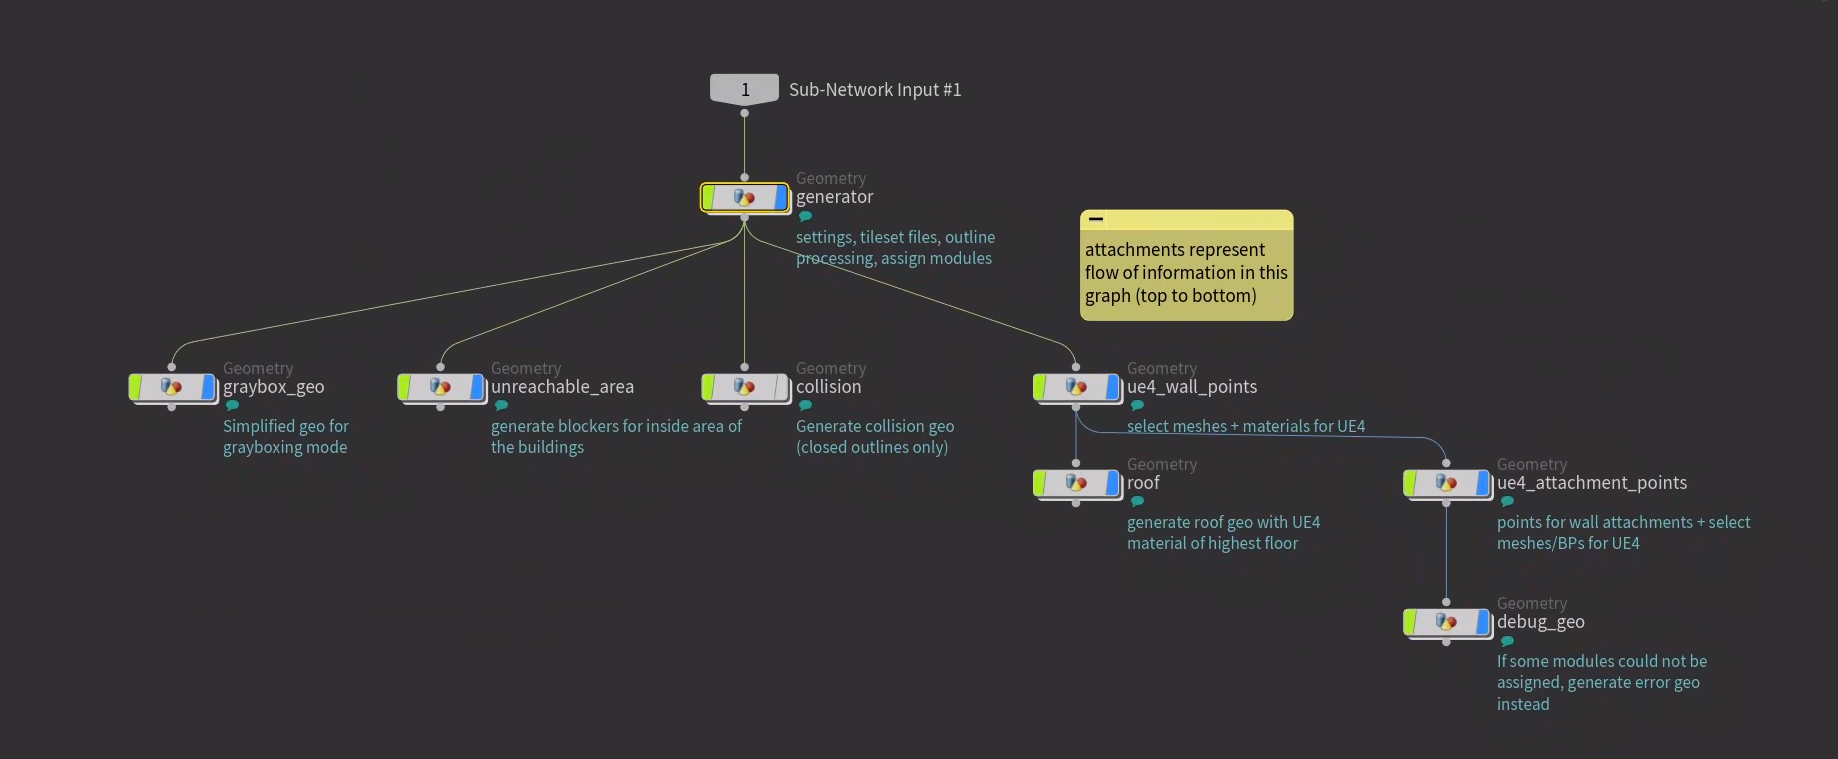
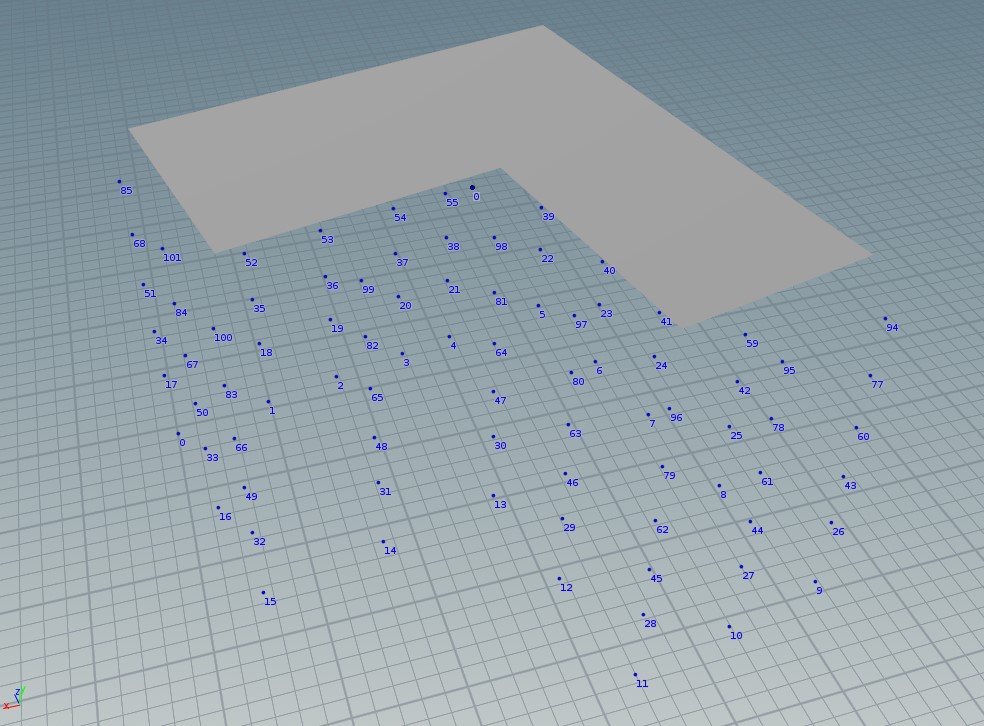
The base idea of this hierarchy is simple: We start the generation with a core generator that creates a grid of points at which potential building pieces may be placed. Then other Houdini objects (see image above) are attached to this “armature” and actually use the points to add…
- instanced static meshes for the main building modules (walls, doors, windows, etc.)
- instanced static meshes or blueprints for additional attachments such as flowerpots, AC units, etc.
- generated static mesh geometry for the roof, graybox previews, debug info
- generated collision geometry
As most of the building geometry in UE4 consists of instanced static meshes and blueprints, the buildings in Houdini consist only of the roof and the instancing points.
Building Generation Pt 4 - Using the Tools
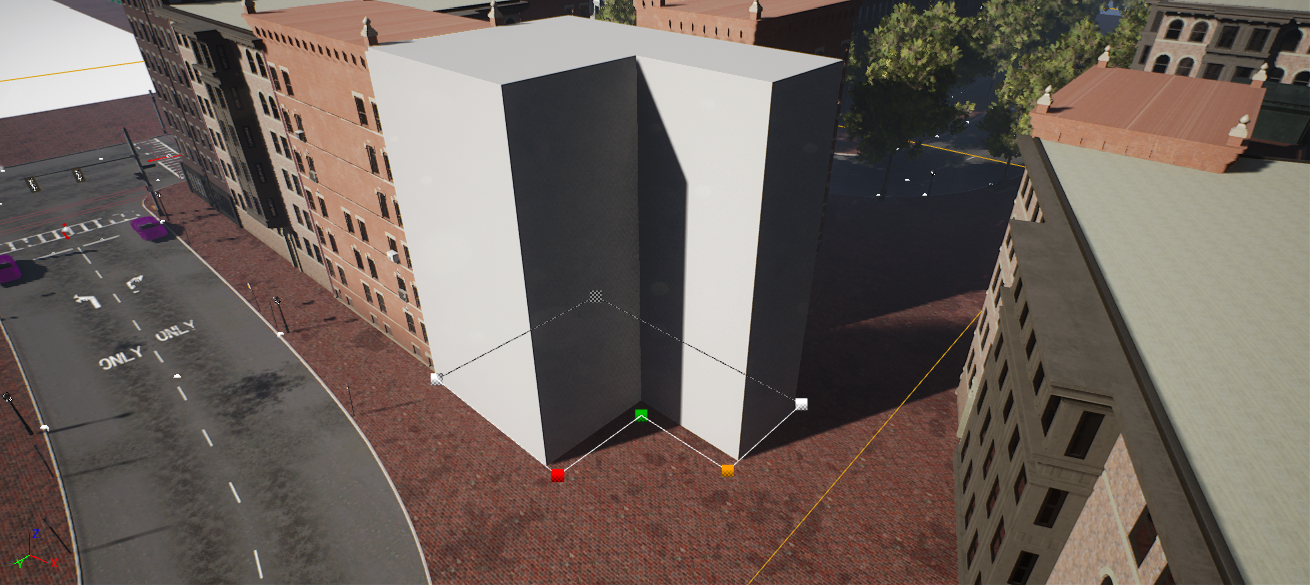
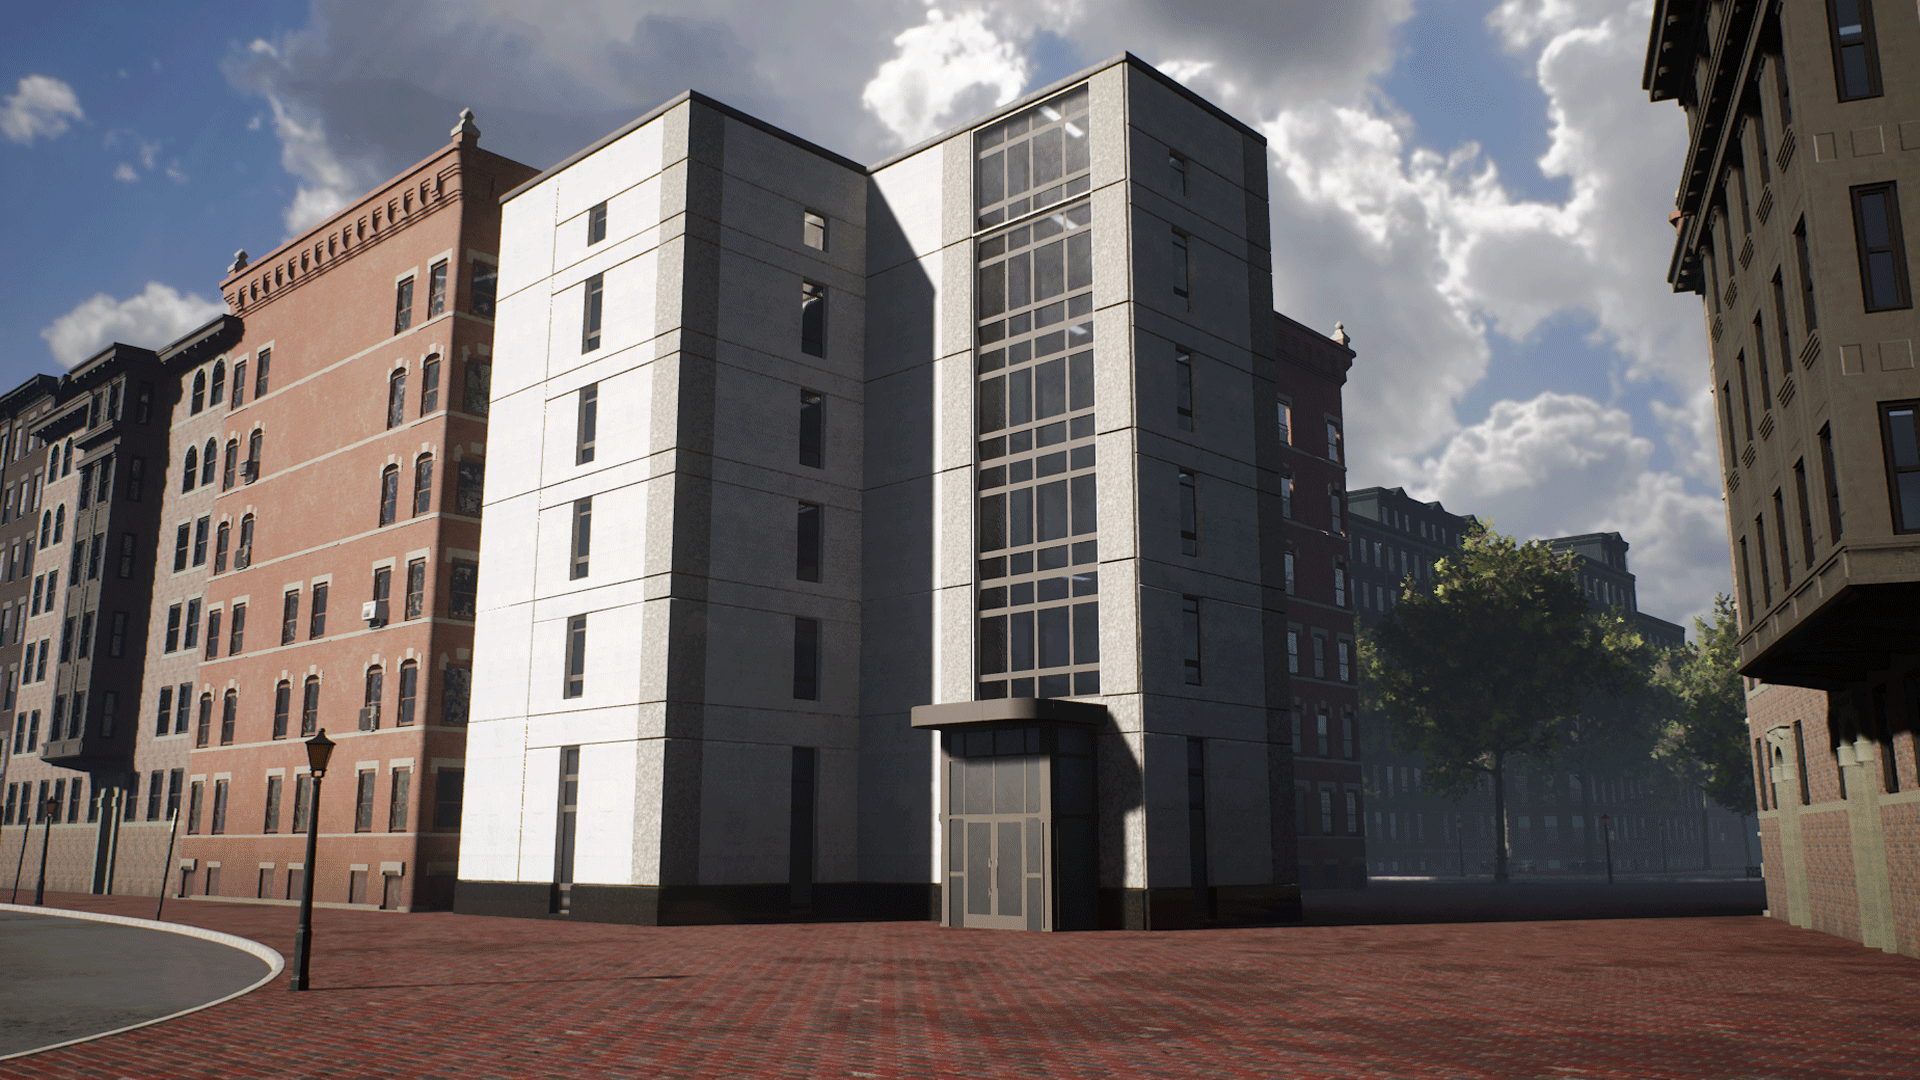
To speed up the initial placement of buildings, we added a new mode to the grayboxing HDA mentioned above which already contains outlines for potential buildings. Level designers can simply select an area with a polyline and new editable buildings are placed for all contained outlines.
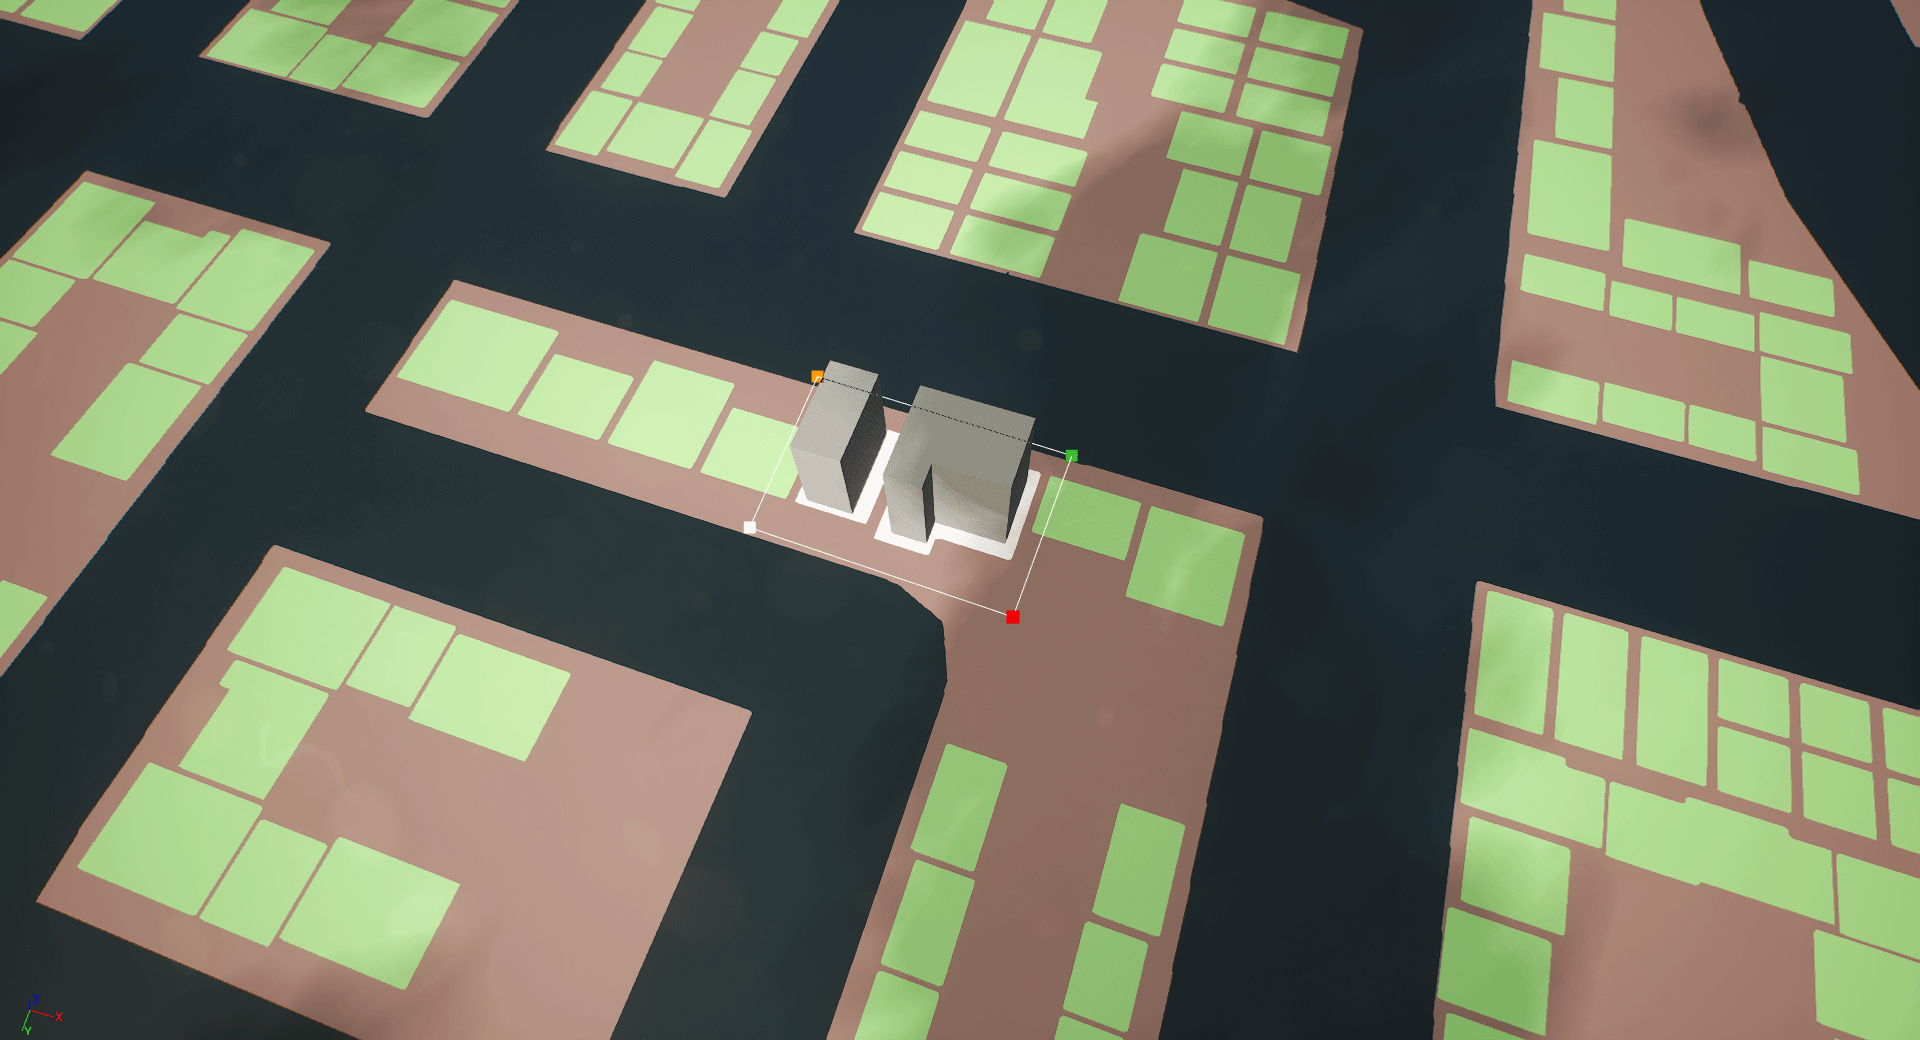
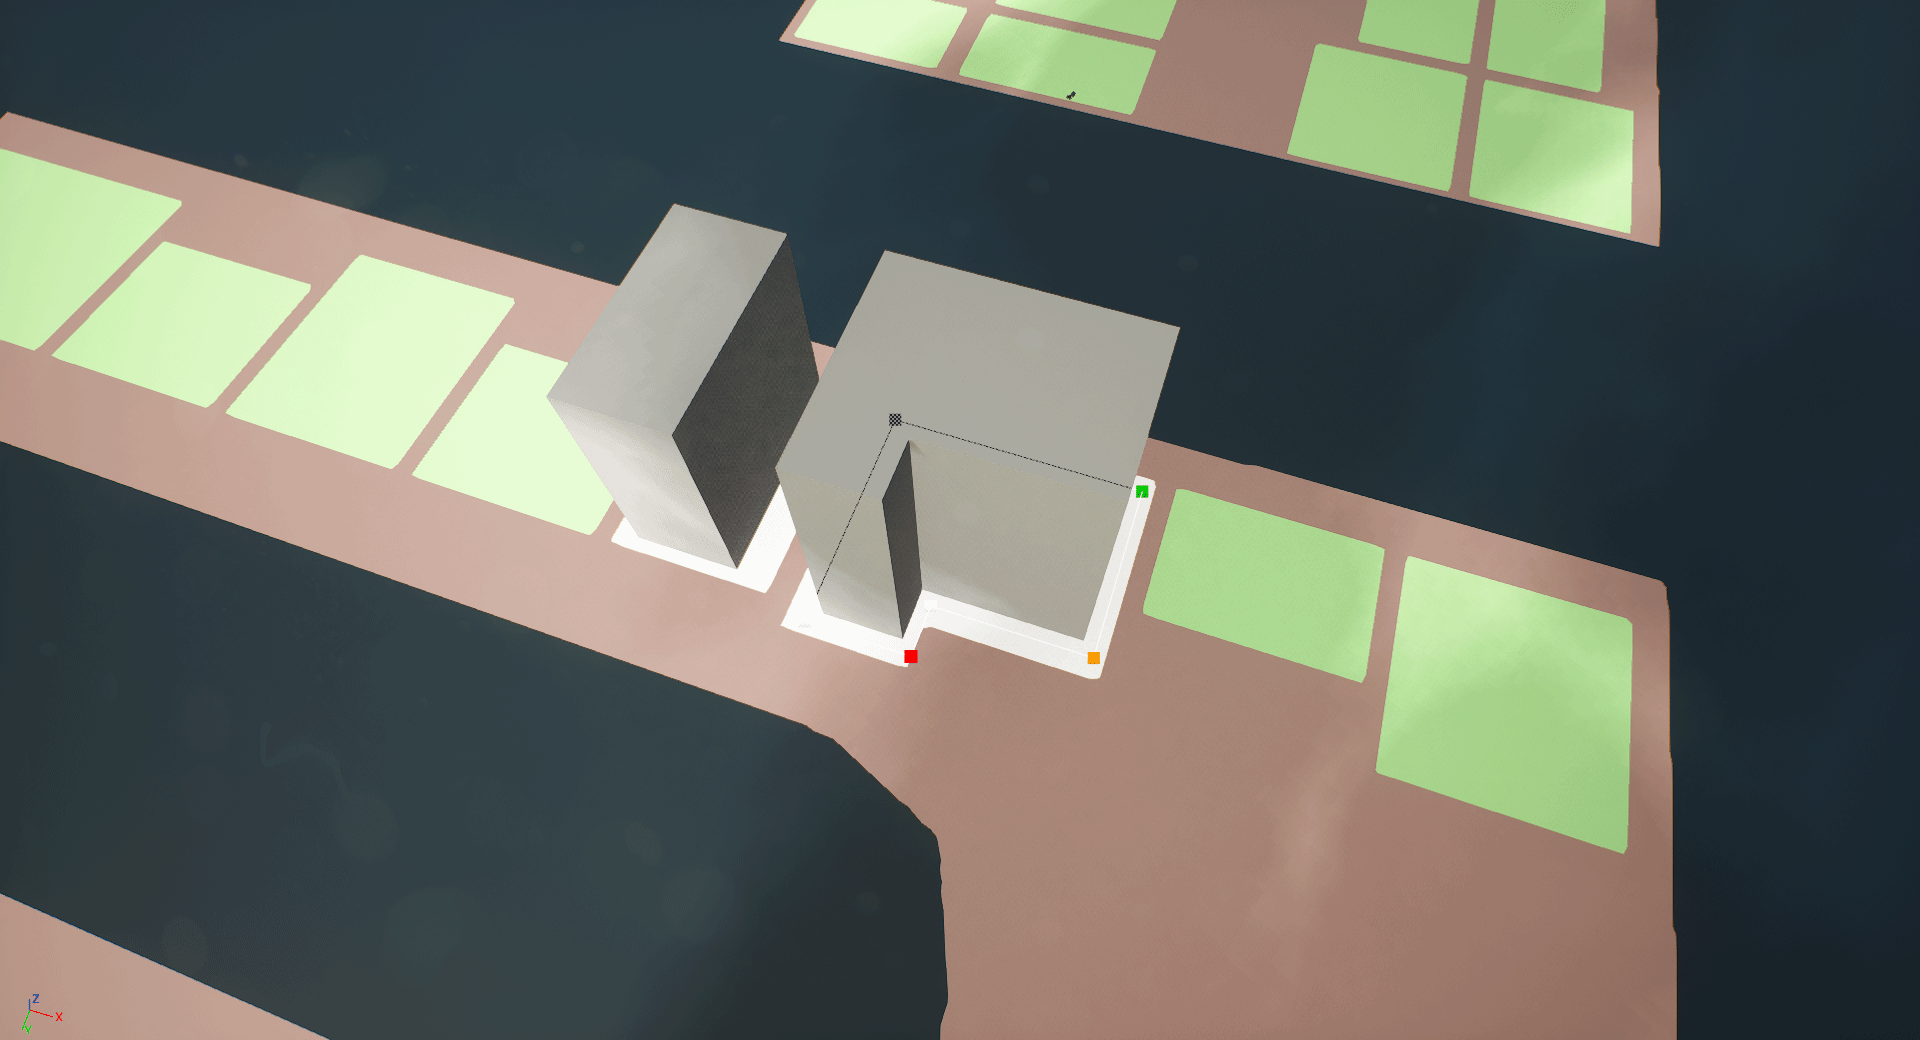
Buildings are initially generated in a grayboxing mode that takes less generation time and therefore enables faster iteration of the ground outlines and building height.
Artists can then switch over to the actual tilesets in which all of the meshes and blueprints from the UE4 data assets are instanced. A random tileset is assigned automatically, based on the area in which the building's origin resides, but any of these settings can be manually overridden.
These areas are defined with the area grayboxing tool mentioned above in the “Grayboxing and Planning” section.
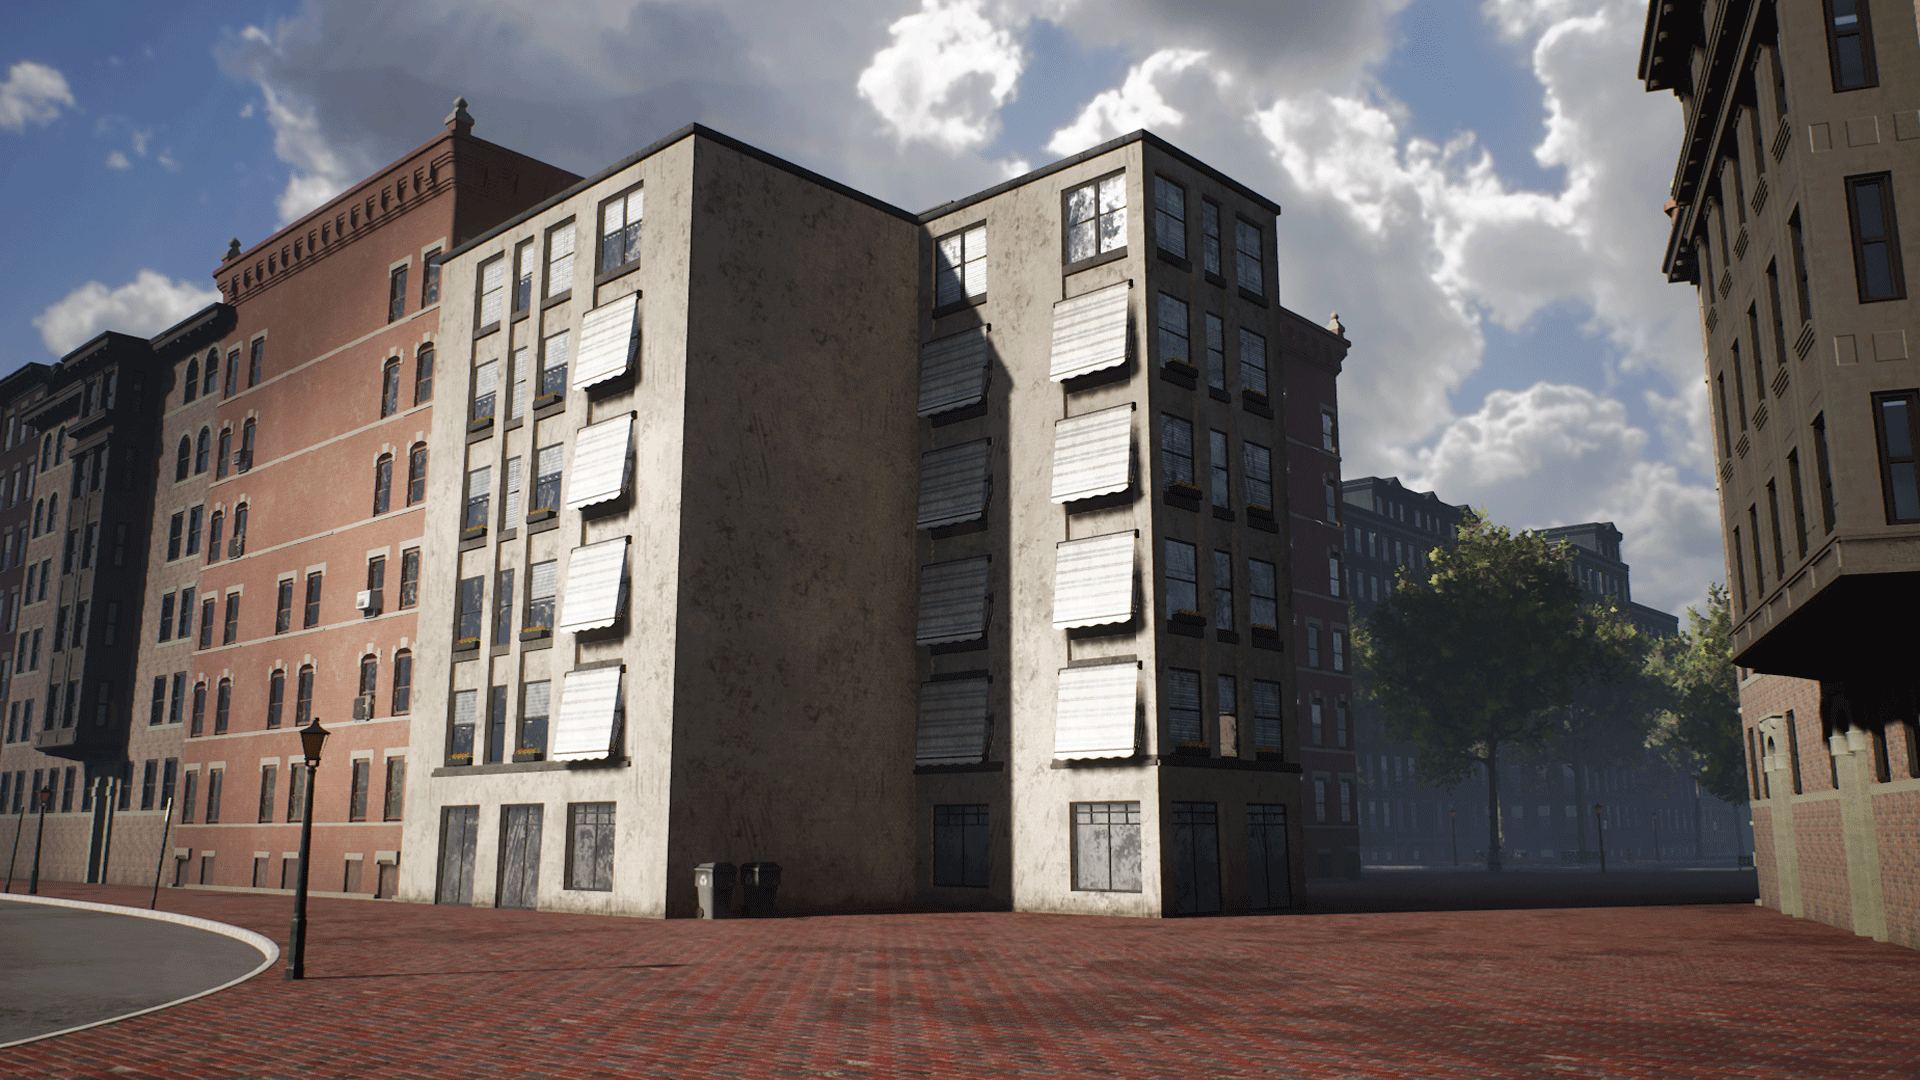
Sometimes the outline has to be tweaked a little bit after changing the tileset - after all, meshes with different base grids will result in slightly different outline shapes. From this point on it usually makes sense to make some adjustments to the walls and adjust the number of floors to make the building blend in better with its environment.
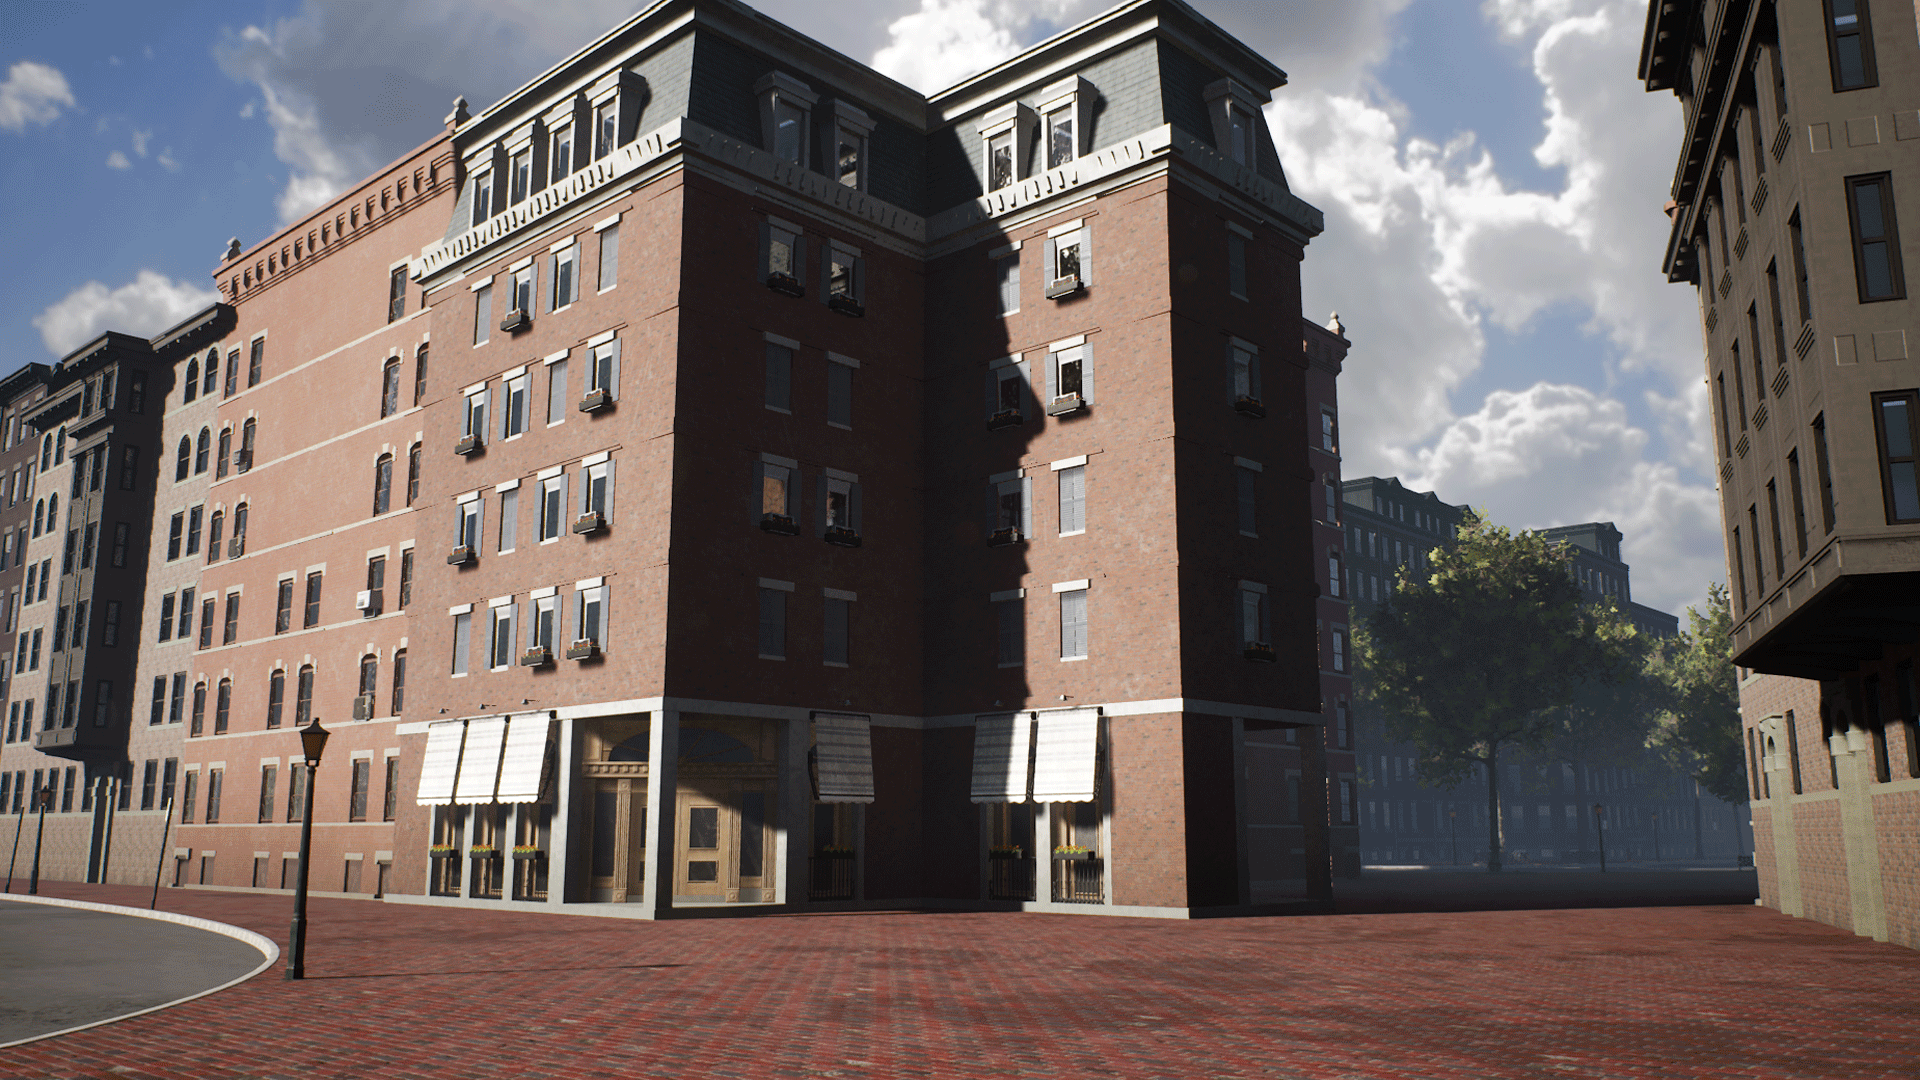
In all cases the generated buildings are just the foundation for manual beautification. Of course, the tools already offer many creative decisions and our target was always to reduce the manual work required, but some props still need to be placed manually to make the level feel more organic and recognizable.
Microtools
Whenever we had some new demands for the tools from an artistic or gameplay perspective, we expanded the generator and added small tools that allowed artists to influence the Houdini generation on a more detailed level to visually refine an area or make some performance optimizations. One example are geometry volumes that enable the modification of enclosed objects by removing or adding props, swapping materials, or cutting holes into the generated geometry.
Because these features were added little by little, not a lot of forethought went into them in the initial design phase during which we set up our pipelines. In hindsight we had some usability issues, especially with the aforementioned volumes, because they would constantly overlap and clutter the level, making it harder to get a clear picture of what was going on.
This opaqueness of some of the tools was amplified by the waiting times required to see the actual output of the generators. We had done a good job with the road network preview (see above), but some of these smaller tools lacked immediate visual feedback.
We don’t have any clear plans on how exactly we want to address these issues yet, but for the next version of the tools we will certainly focus even more on usability, iteration times and the maintainability of complex scenes.
Continuous Integration Pipelines
The long execution times of HDA rebuilds and bakes mandated automating most of our Houdini pipelines. To accomplish this, we wrote custom UE4 commandlets which take care of rebuilding, baking and submitting assets to perforce. These pipelines are an important part of our overall CI setup.
The Houdini commandlets are usually executed after working hours because they have to check out and submit content to the same maps that are used by content creators. While we do have separate maps for HDAs of roads and buildings, the final meshes have to be baked into the same streaming levels alongside manually placed assets. We use actor tags to differentiate between Houdini/pipeline-controlled actors, and manually placed actors so we can freely delete and replace previous bake outputs every night.
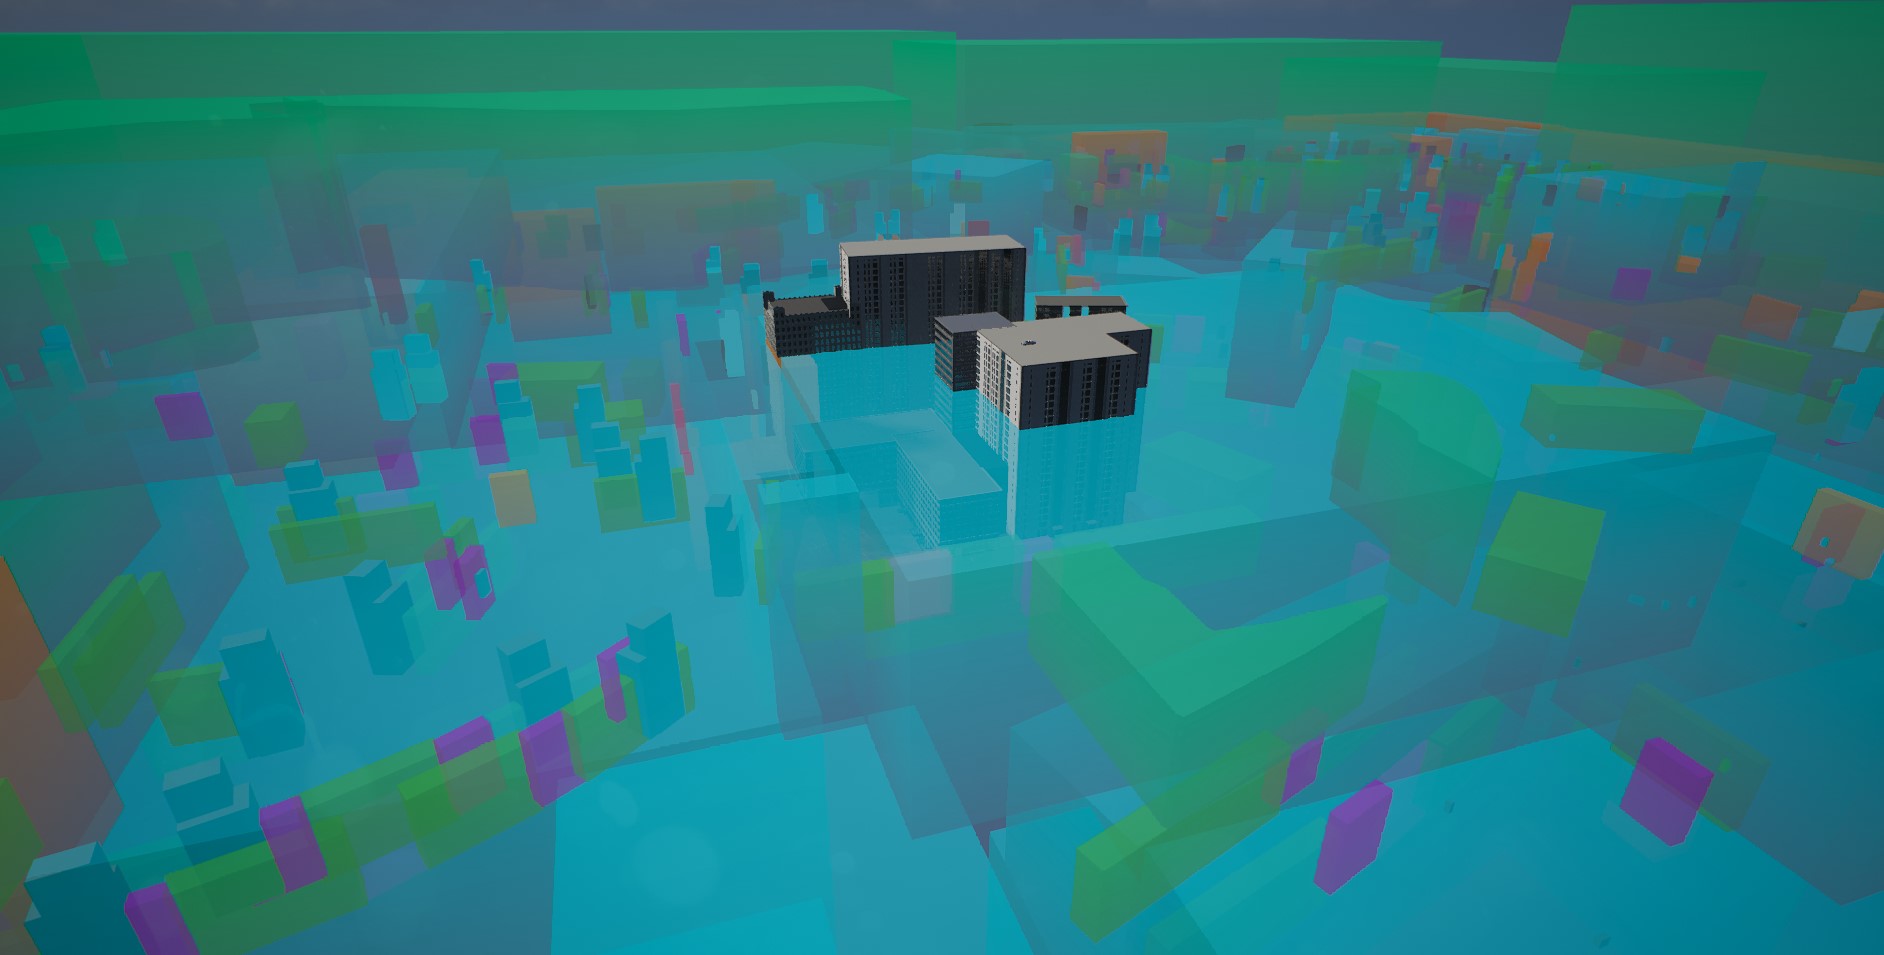
Level Streaming Proxies
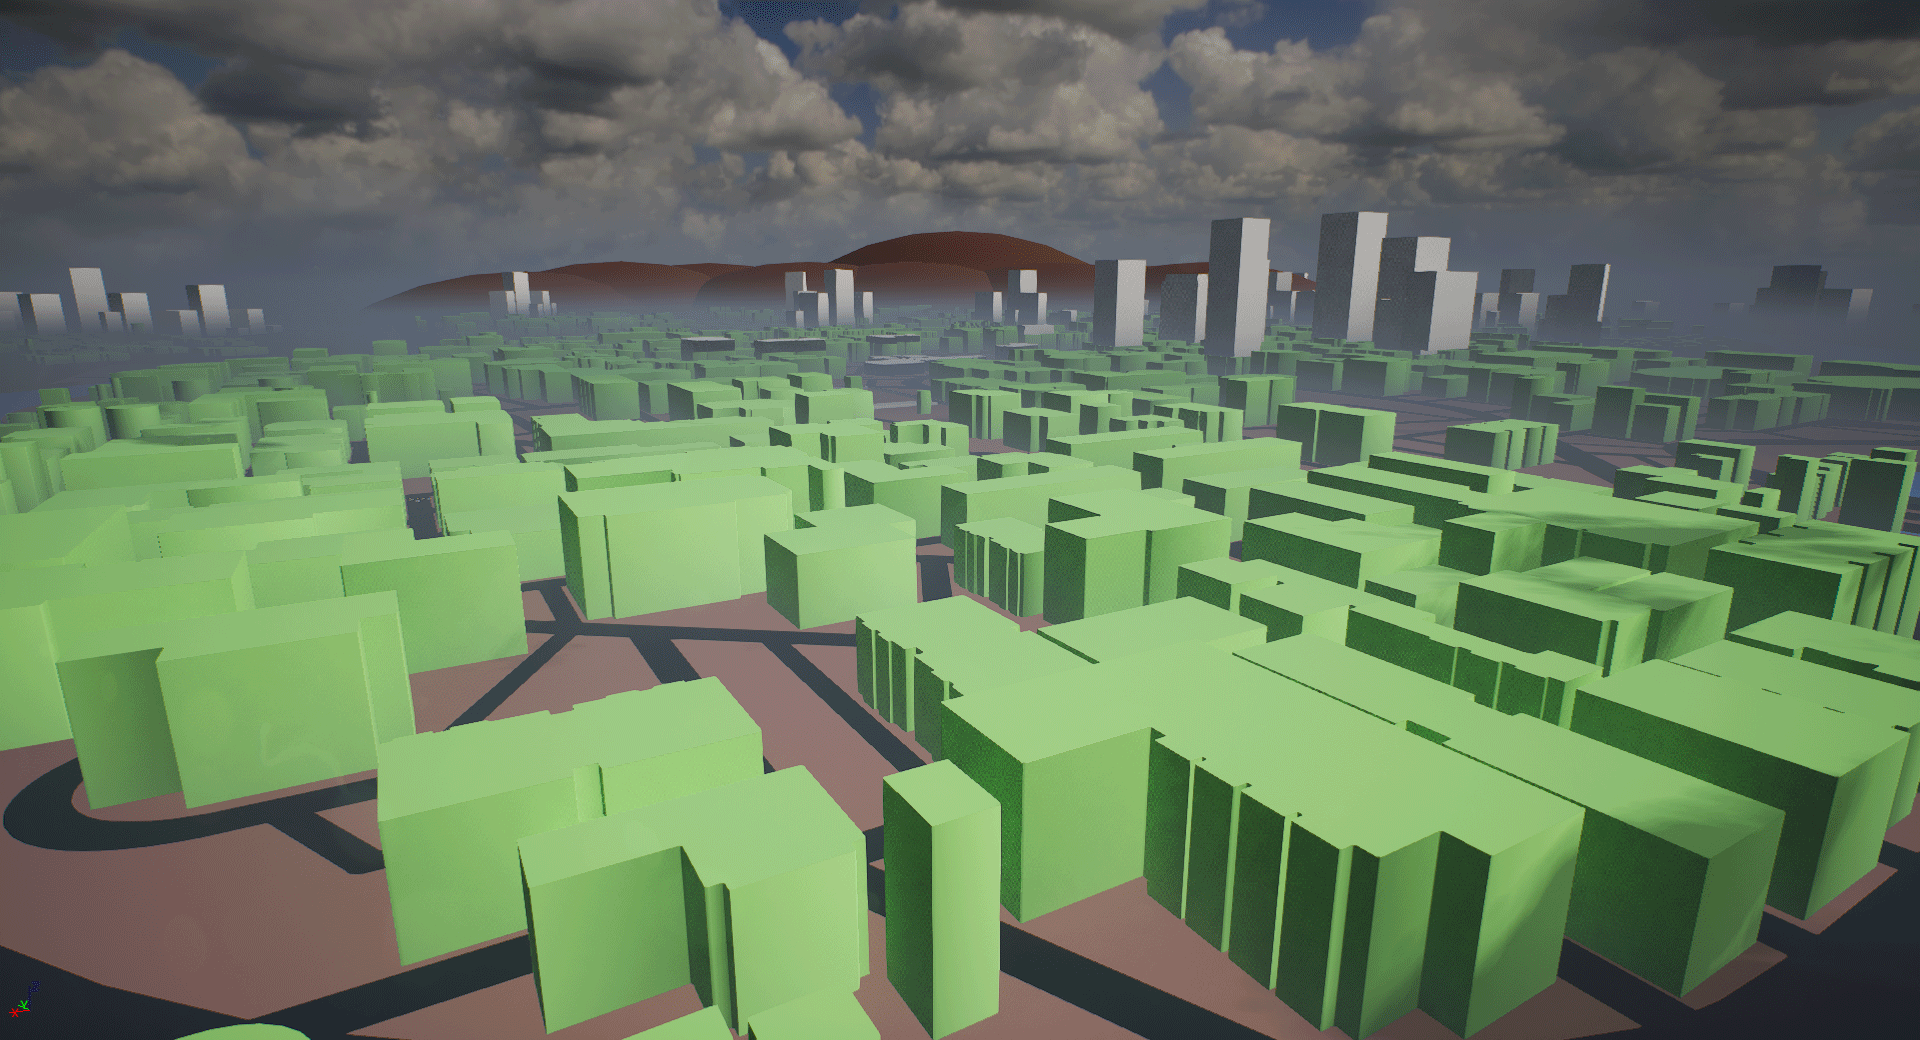
We use UE4 level streaming proxies (also called level LODs) to reduce the number of streaming levels that need to be loaded at the same time. Our proxy generation commandlet loads up all original levels and bakes their entire content into a single proxy mesh per streaming level.
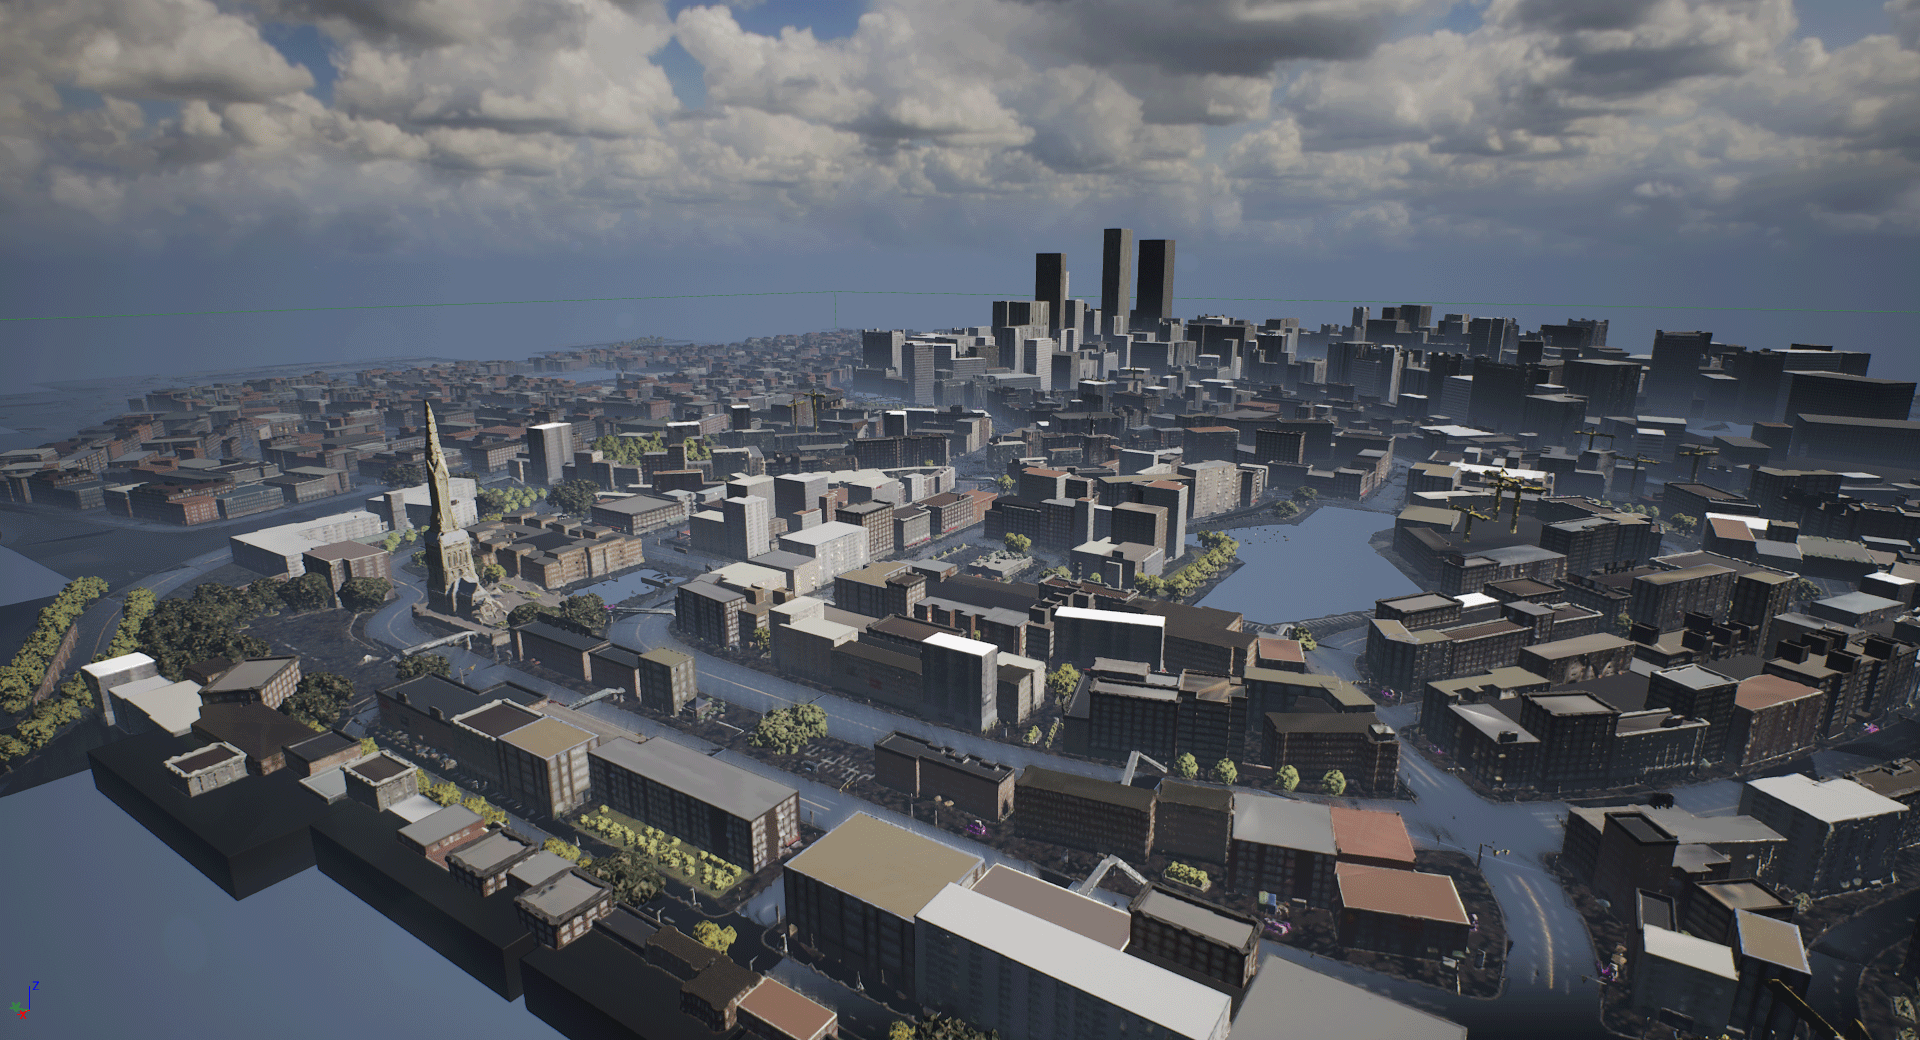
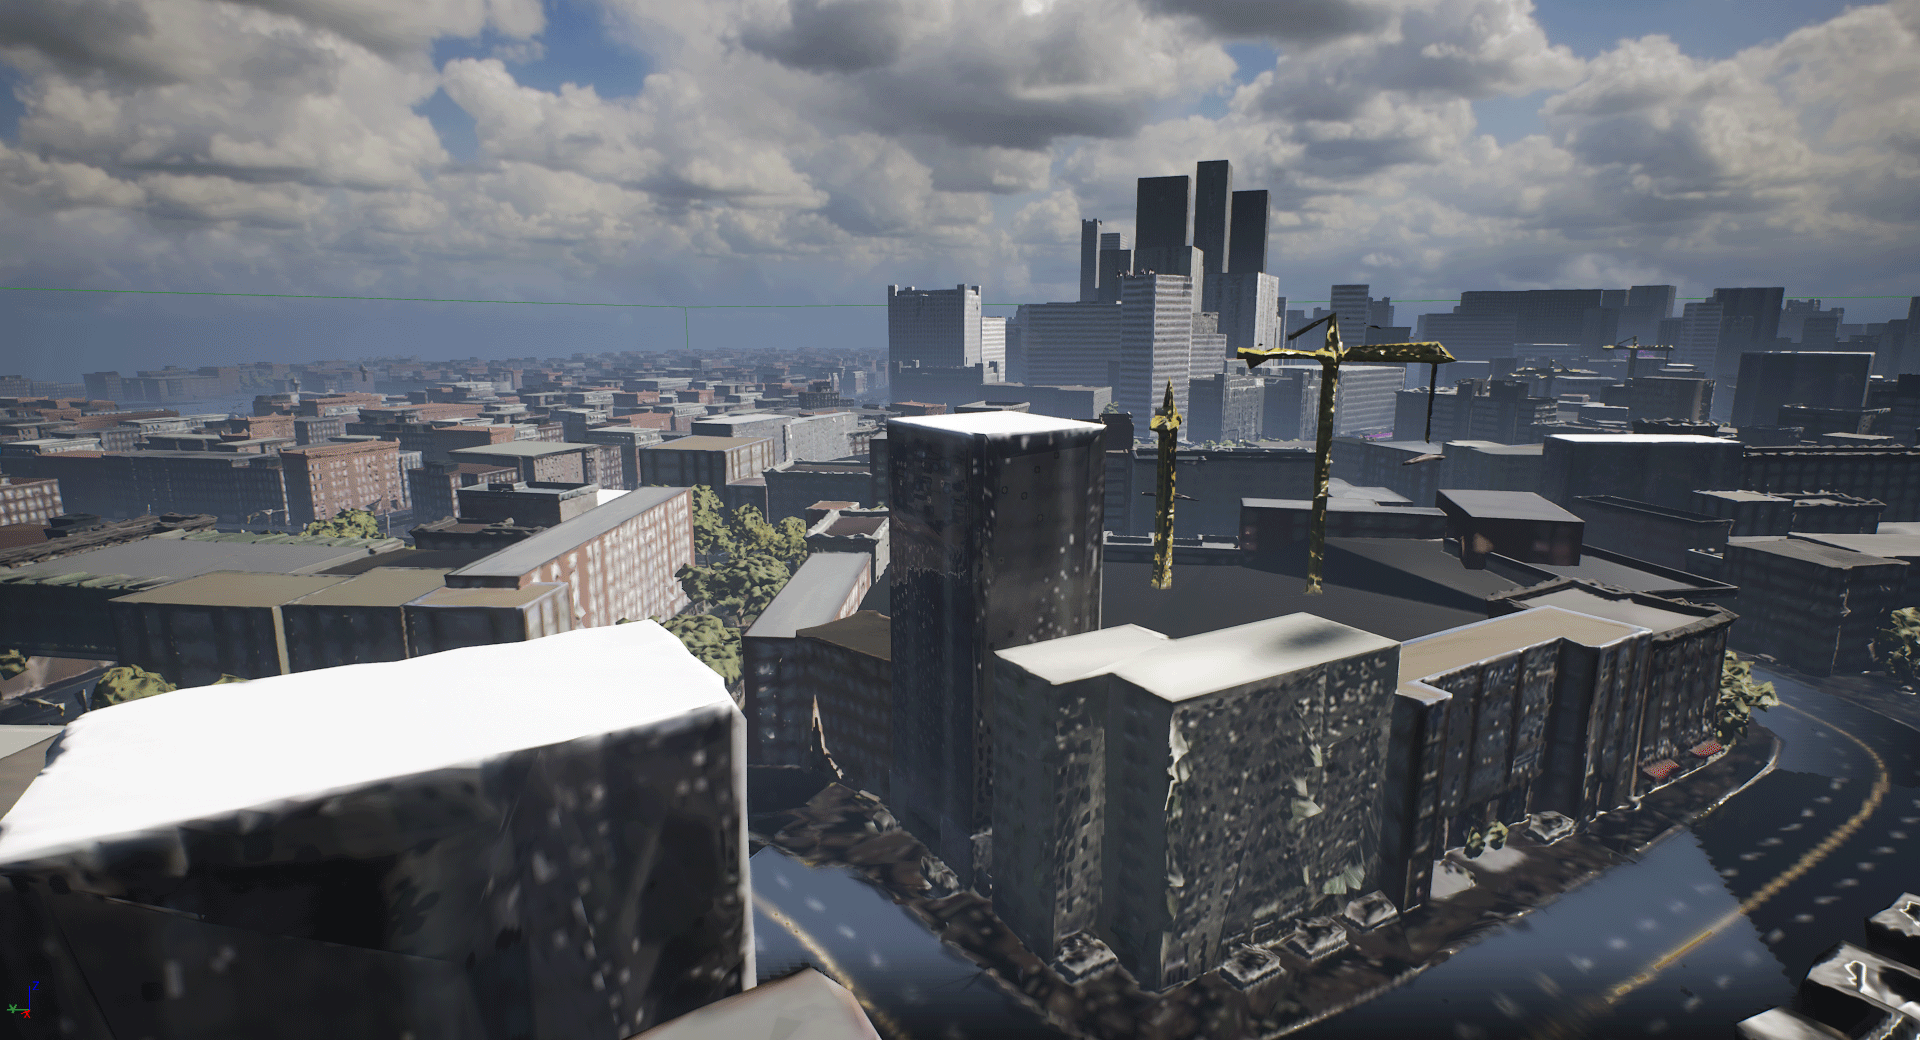
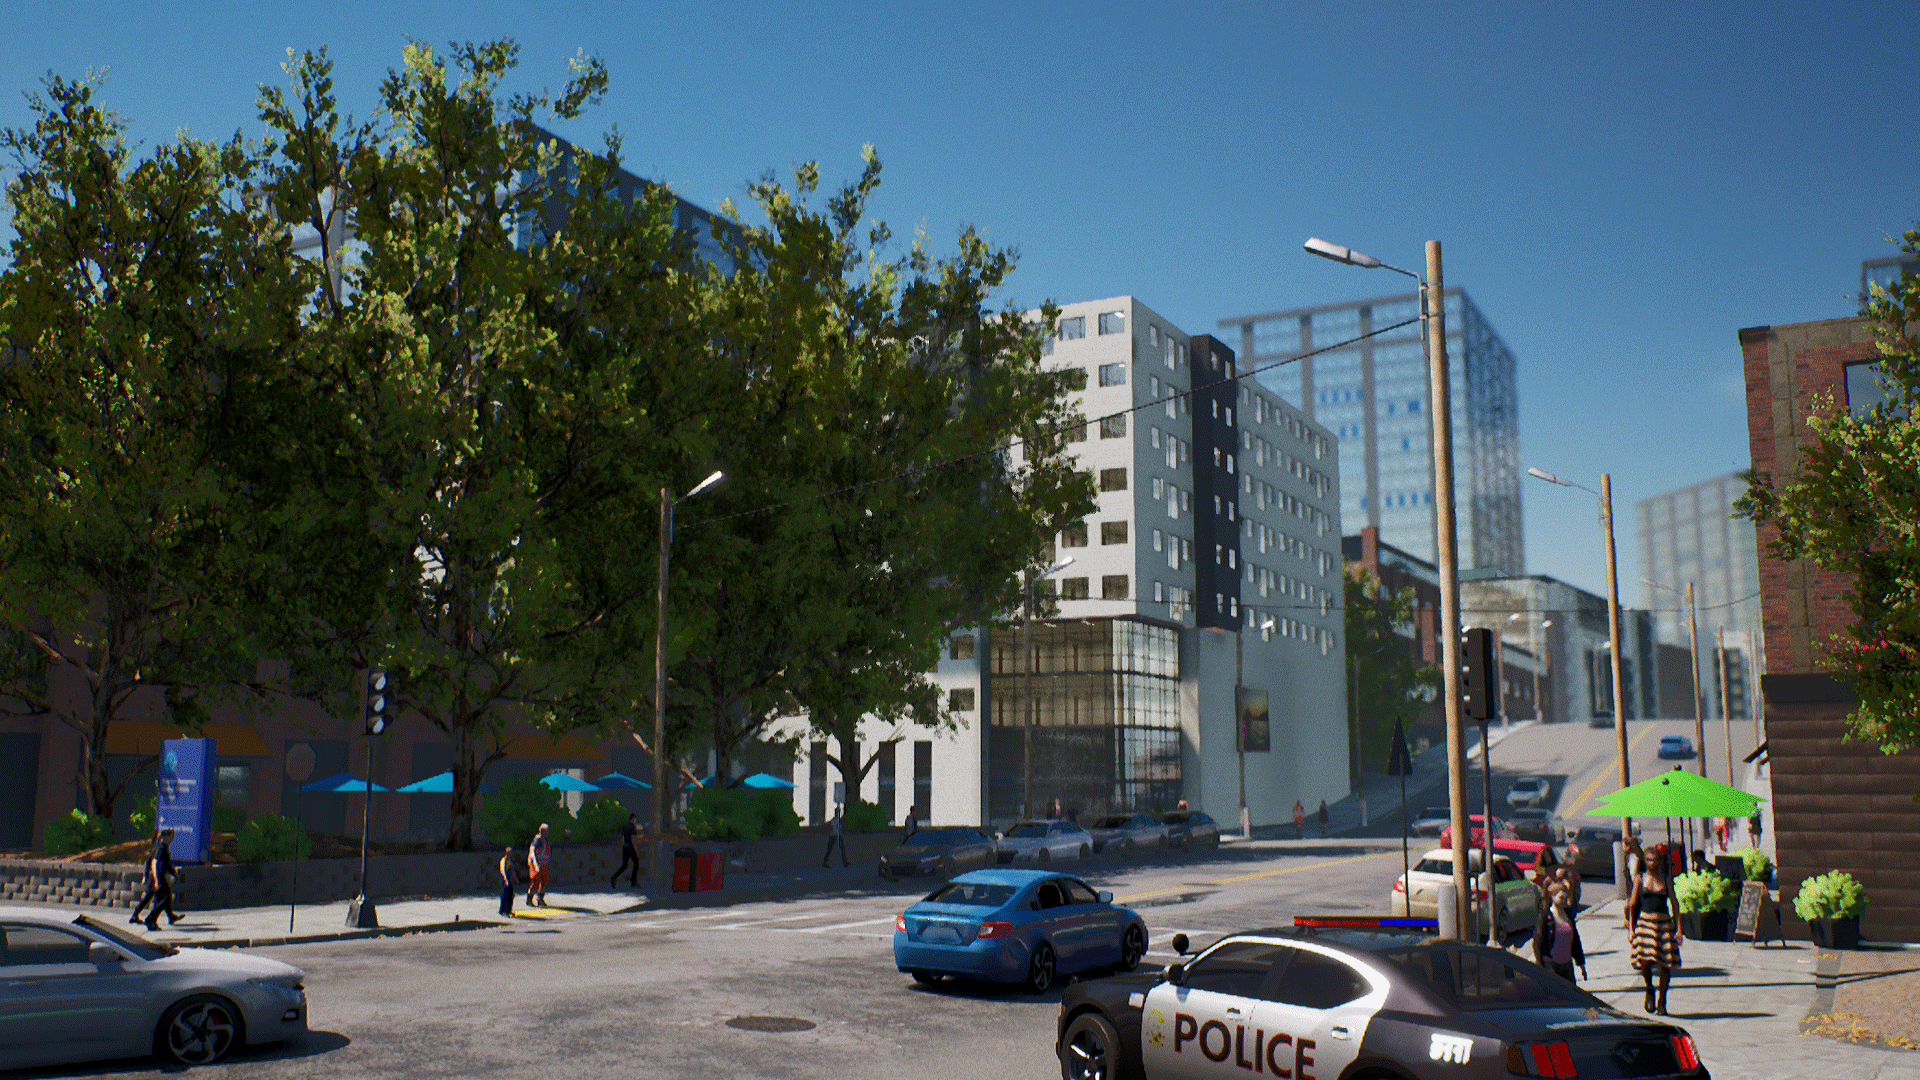
Obviously, the result looks super chunky up close, but when it’s loaded in the distance we get a nice skyline of the city as seen here in the Downtown district:
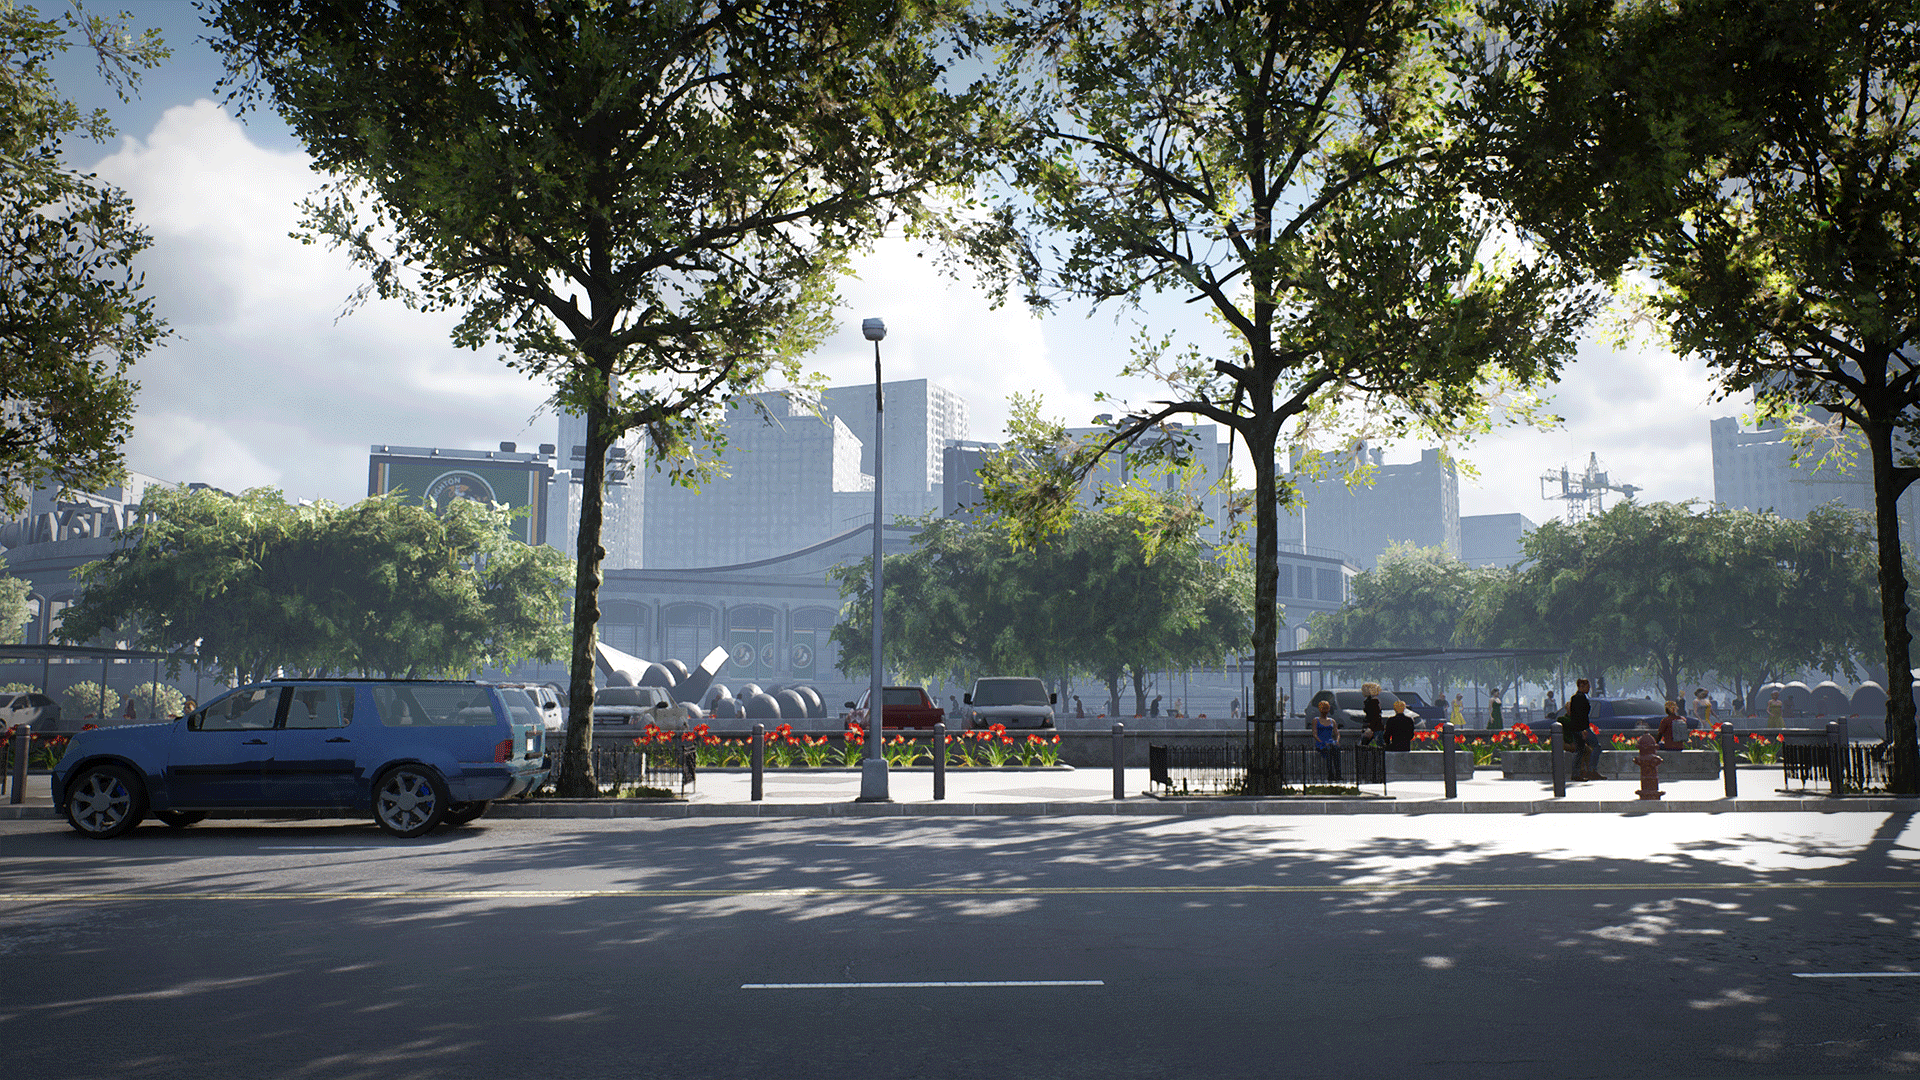
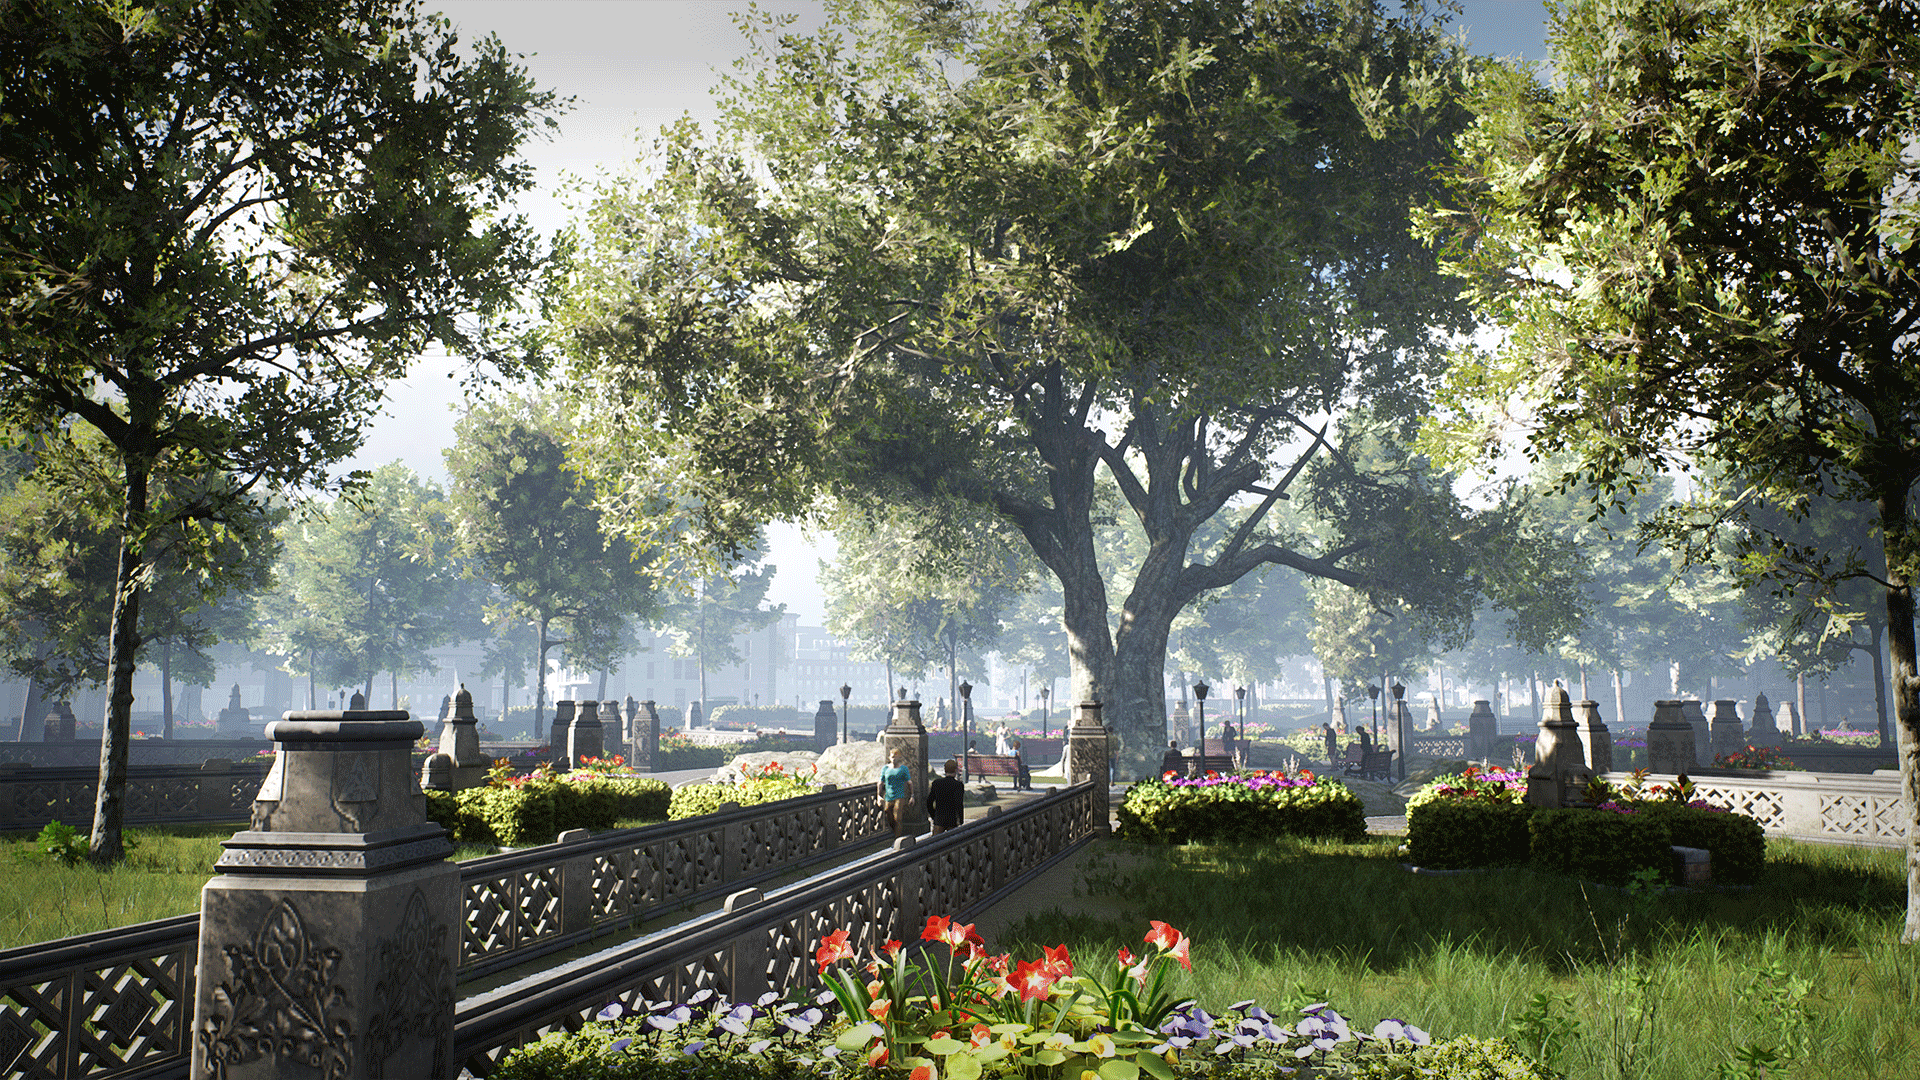
Parks and Landscapes
If you play PS:PO, you will notice that the city of Brighton is not all flat ground and concrete. There are some beautiful parks scattered all across the city. These parks are not made with any Houdini tools. Instead, they are built by our artists in UE4’s landscape editor.
Aesir PreCook
Everything generated by Houdini can be optimized without a big effort because we can adjust the generation algorithms and simply re-run the pipelines, but we also want to allow artists to place blueprints by hand and use them as a creative tool to assemble combinations of props. To deal with such actors, we made use of a tool from our toolkit: The Aesir PreCook is a commandlet that runs a preset of optimization steps on an arbitrary set of levels. Some of the things it can do:
- convert child actors into standalone actors
- break blueprints without logic up into their components
- batch components with the same settings together
- create hierarchical instance static meshes where possible
- convert ground decals into static mesh planes that render into a runtime virtual texture
- register all lights with a single light manager actor per streaming level
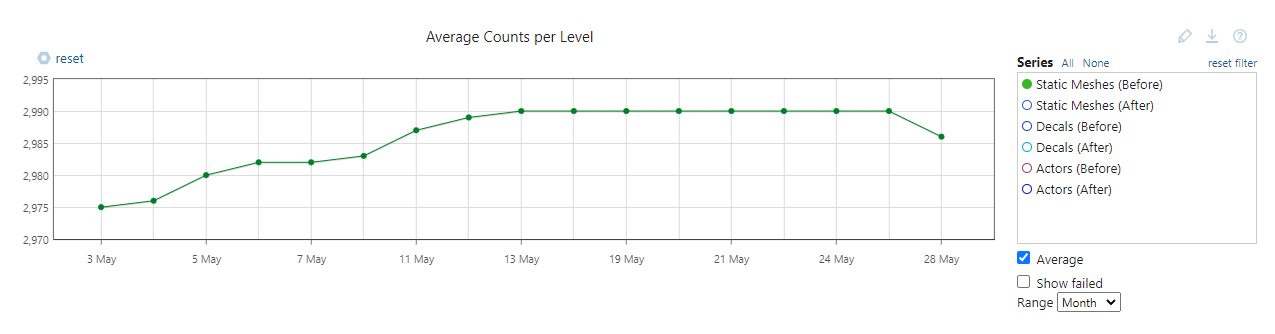
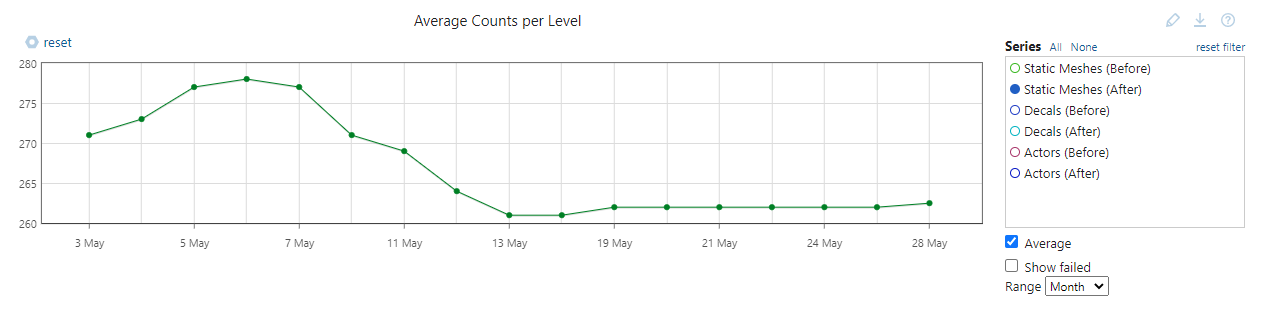
All of these steps are super simple by themselves, but when combined they yield great performance gains. The overall execution time fluctuates a bit based on the density of content. Timings range from 8 - 12 seconds per 150m parcel, that is 5 - 10 min per km² or 30 - 40 min for our entire map.
As a nice side effect, we were able to easily add level metrics such as actor counts, memory size and their development over time.
After the precook we run the regular cook and packaging steps via BuildCookRun and deploy our builds to a Steam branch for testing.
Final Words
We hope this article was insightful and gave you an idea of the work that went into creating our beautiful open world. After all this talk about the technical aspects of our open world tooling it’s easy to forget how many other people are involved in making this game possible. So here’s a big shout-out to our incredible environment art team and everyone else who contributed to the game!
Thanks for reading!
If you want to visit some of the areas shown in the screenshots above, you can grab a copy of Police Simulator: Patrol Officers on Steam.
If you have any feedback on the article or simply want to reach out, you can join our Discord server.
If you’re interested in the timeline of the ongoing development of the game, it’s worth checking out our Early Access Roadmap where we outline all upcoming updates.